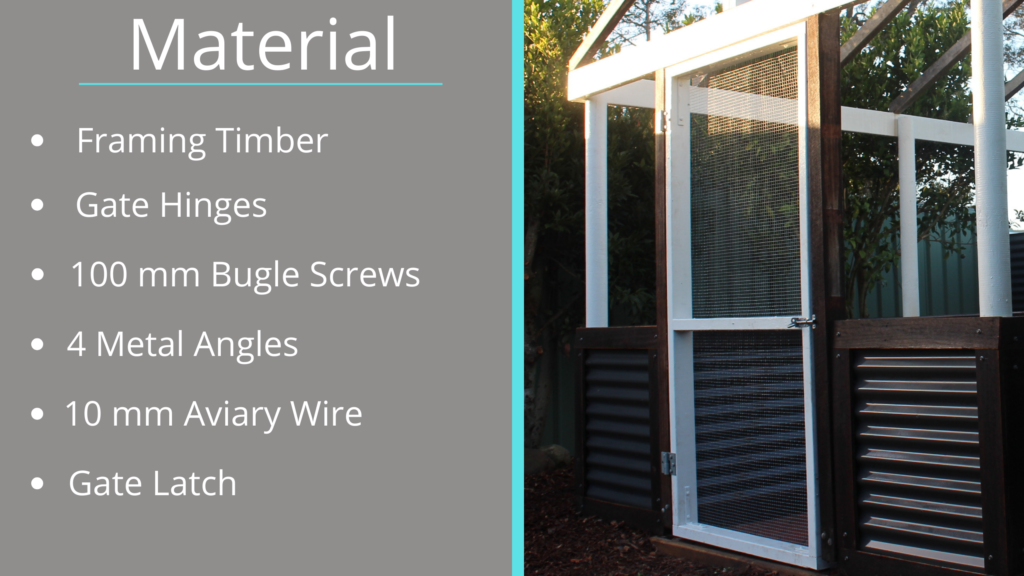
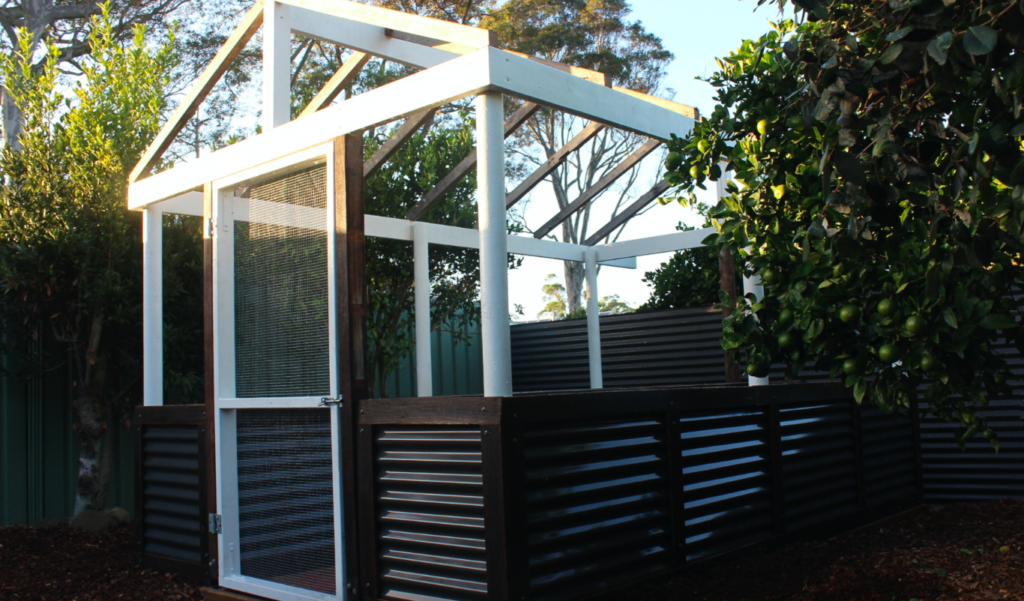
Welcome to Greysand, your go-to source for DIY home improvement projects. In this blog post we’re diving into a fun and straightforward project on how to build a simple wooden gate: building and installing a timber garden gate with a minimalist design.
We’re keeping it simple and efficient, and the best part? No diagonal bracing required. So, let’s get started on creating a clean and modern garden gate that adds security and style to your property.
Choosing the Right Aviary Wire
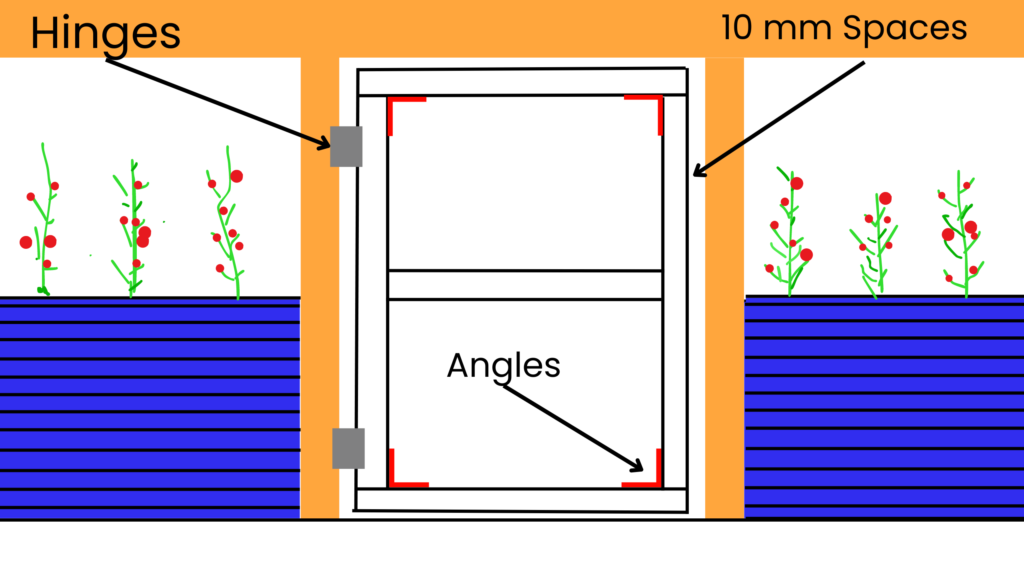
Before we dive into the construction process, let’s talk about the 10mm square aviary wire we’re using. It’s our wire of choice due to its square shape, which makes it excellent at holding itself straight. What’s even better is that once you stand back a few meters, this wire becomes nearly invisible, offering a neat finish.
Unlike some other wire products that may be visually unappealing, this square aviary wire seamlessly blends into the background, enhancing the overall aesthetic appeal of the final installation.
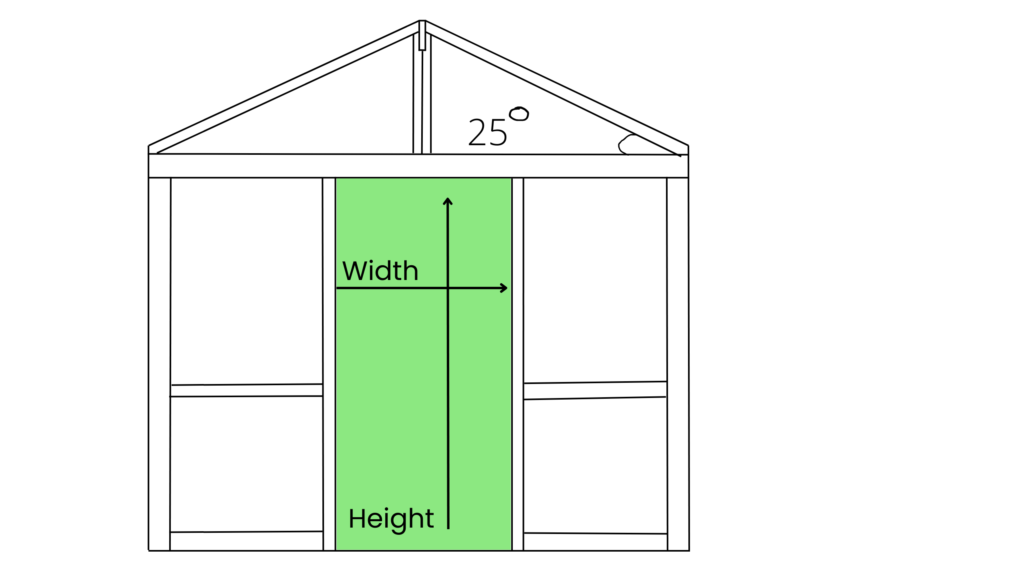
Step 1: Determining Gate Size
To start, determine the height and width of your gate by measuring the opening size and making necessary allowances. For this project, we’re aiming for a minimalist and effective design, with no intrusive diagonal bracing. The gate will be covered in 10mm aviary wire, providing security for our vegetable garden.
Step 2: Cutting and Assembling Timber Framing
Our gate’s design is simple but efficient. Double-check your measurements and cut the outside frame of the gate. Essentially, it’s a rectangle box. We’re focusing on efficiency, so remember the age-old adage: measure twice, cut once. No need to overcomplicate things. The absence of diagonal bracing keeps the design clean and sleek.
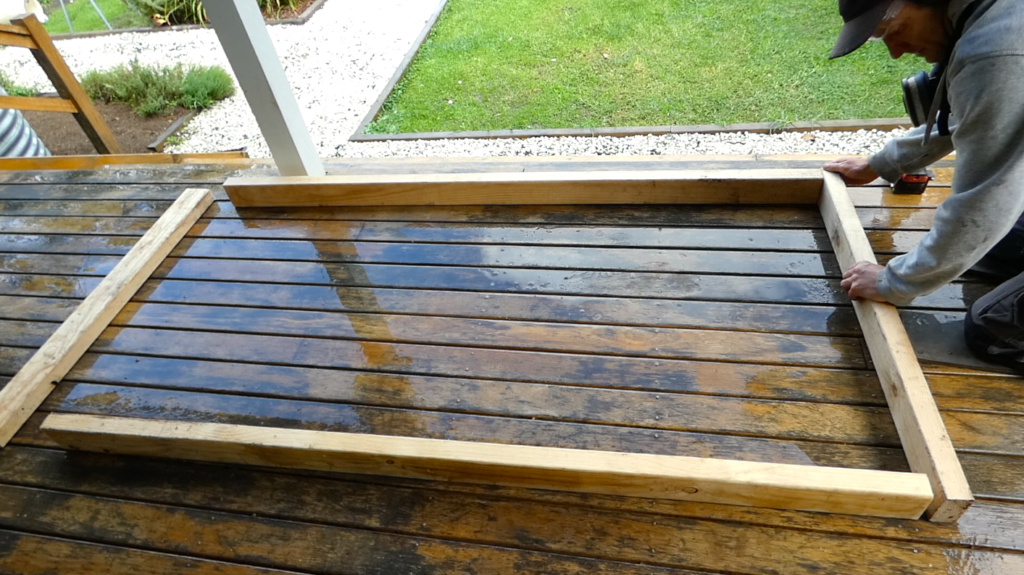
Step 3: Assembling the Gate Frame
With the wooden planks cut to size, it’s time to assemble the gate frame. Start by laying out the horizontal planks and then position the vertical ones to create the frame.
Ensure the frame is square on a flat surface and secure the pieces with 100mm buckle screws. It’s like putting together a puzzle, and in no time, you’ll have a solid frame without any diagonal bracing.
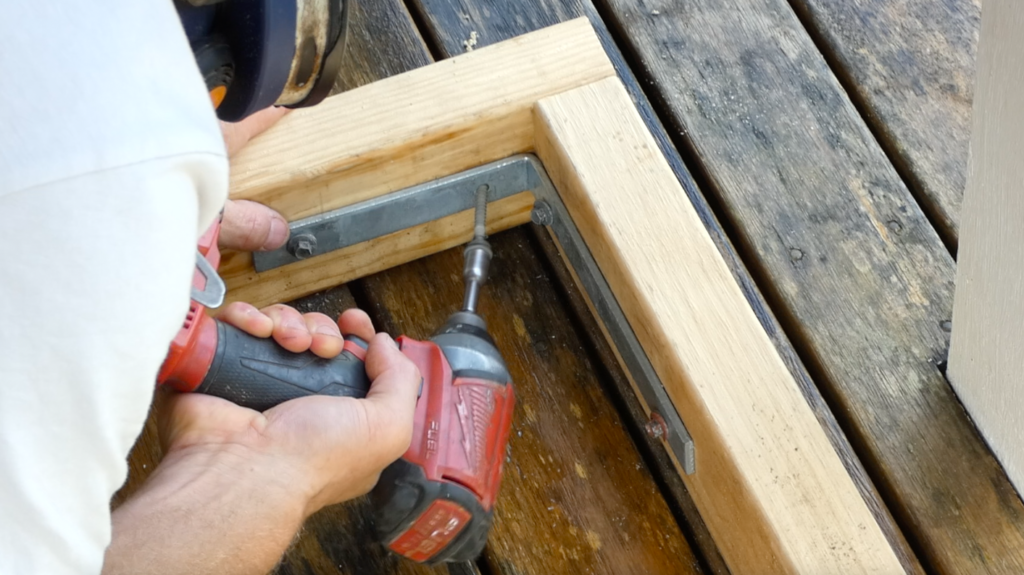
Step 4: Installing Metal Brackets
In keeping with our simple and open design, we’re using four 90-degree metal brackets in each internal corner of the frame.
These metal angles provide the necessary bracing, ensuring the gate remains square and stable. However, you may want to consider brackets with a 45-degree angle to minimize any potential sagging over time.
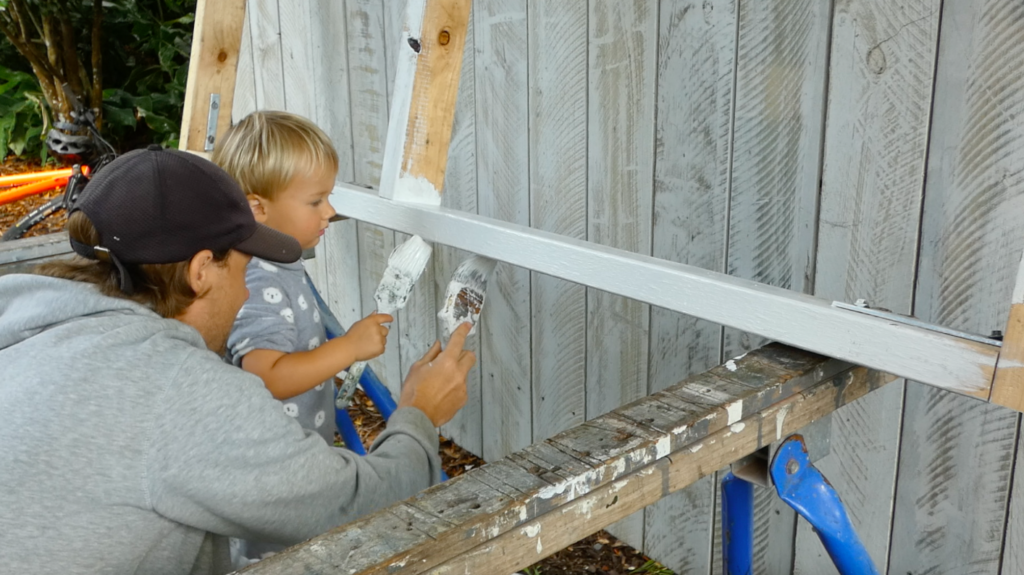
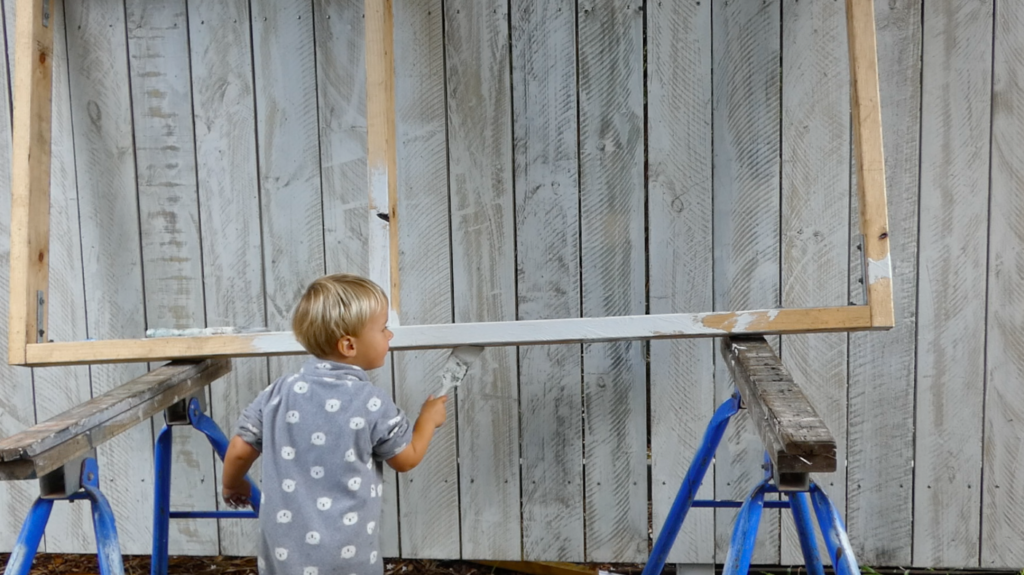
Step 5: Applying Paint
Once the framing is complete, apply a couple of coats of white solar guard paint. This not only adds a polished finish but also helps the gate seamlessly blend in with the rest of the treated paint used in other garden structures, like the veggie pergola frame.
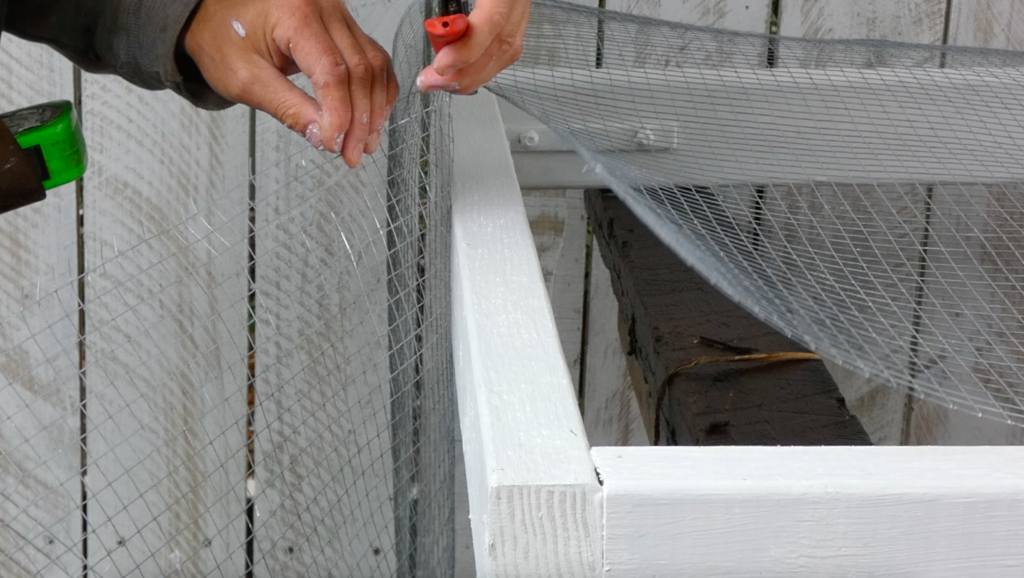
Step 6: Installing Aviary Wire
Since this gate will serve as the entry to our vegetable garden, it needs to keep out pesky birds and vermin. To achieve this, we’re using 10mm aviary wire rolled down the back of the gate. This wire will enclose the entire pergola, protecting our vegetables from unwanted midnight snackers.
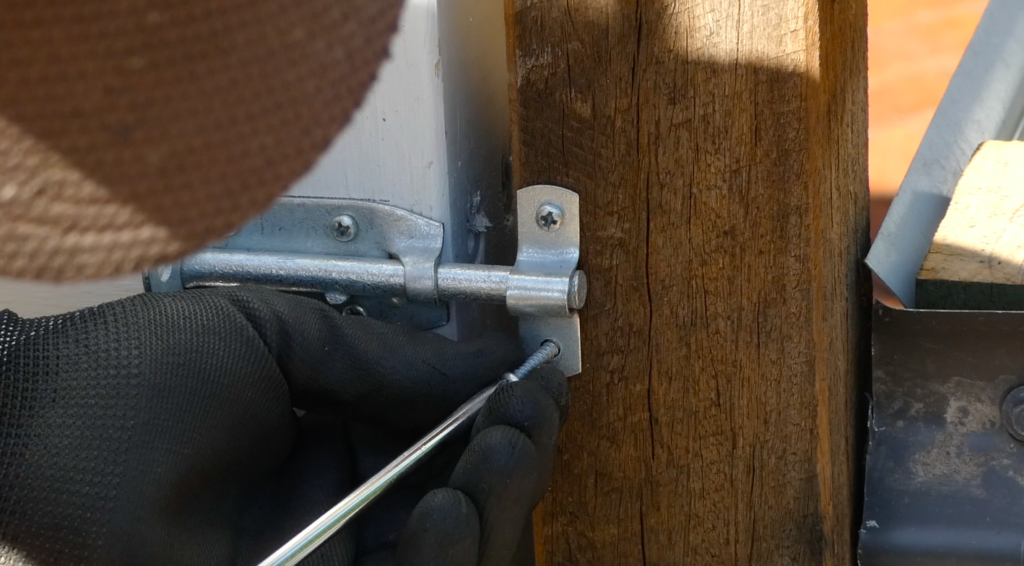
Step 7: Installing Hinges
For smooth gate movement, we’ve opted for heavy-duty gate hinges. It might be a bit of overkill, but they are strong and easy to use. These hinges come in two parts. The first part gets screwed and attached to the gate frame.
Next, position the gate into the opening, and with precise measurements, attach the second part of the hinge to the pergola frame. With this done, your gate will swing smoothly and freely.
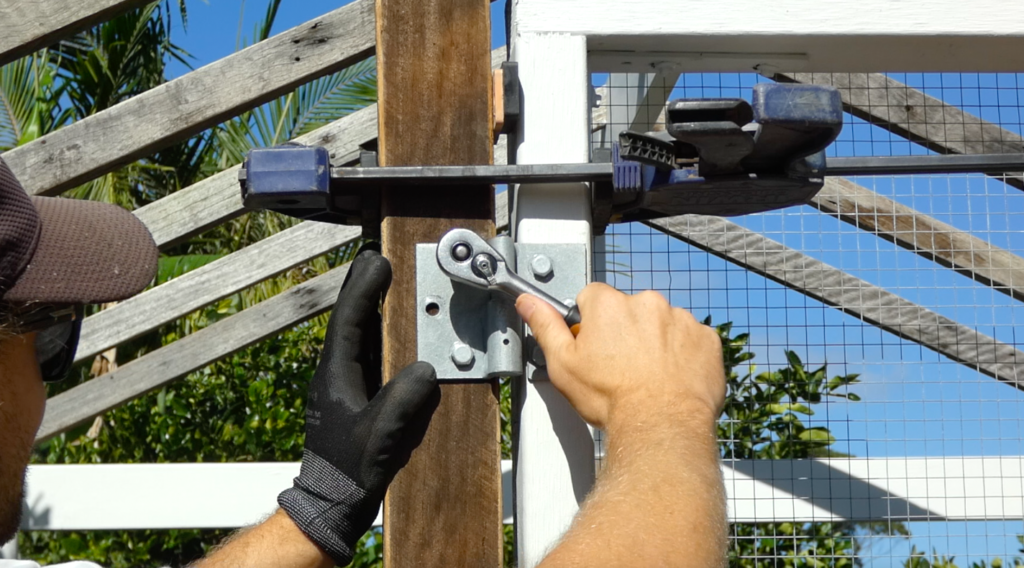
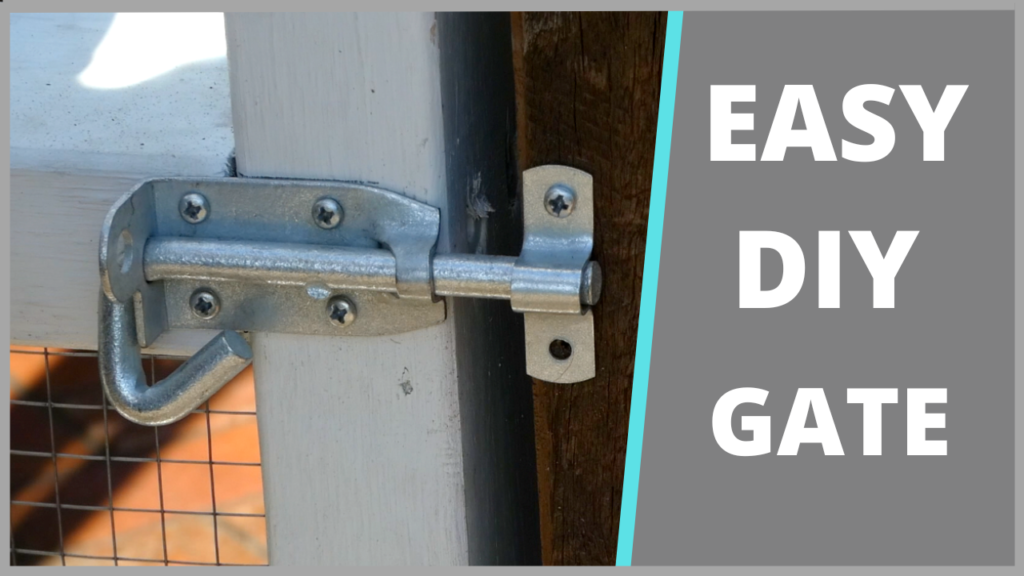
Step 8: Adding a Latch
The final touch your gate needs is a latch to keep it securely closed. A typical gate latch will do the job, ensuring your gate remains in place when needed.
Conclusion: A Clean and Modern Garden Gate
And there you have it, a clean and modern timber garden gate with a simple design. The absence of diagonal bracing not only simplifies the design but also enhances its aesthetic appeal without sacrificing stability. It’s a fantastic addition to any garden, providing both security and style.
Thanks for joining us at Greysand today. We hope you found this project on how to build a simple wooden gate instructive and engaging. DIY projects are all about learning, saving money, and having fun while doing it. We’ll see you on the next project!