How to install a sliding barn door

Hey, this is Alex from Greysand, and in this post, I’ll guide you through the step-by-step process of how to install a large sliding barn door and mounting board track – a perfect solution to conceal and reveal a room, cupboard, or hallway.

How to install a sliding barn door

Important Tip

When installing a large sliding door, ensure you measure the center of the track height from the highest point of the floor. Setting out heights from the lowest point can cause the door to bind on an uneven floor. Use a laser level or a level and straight edge to identify the floor’s highest point.

This door, being 1500 mm wide, may pose challenges on uneven floors. Ensure your measurements consider the highest point for a smoother installation.

Second Tip

When purchasing a barn door, ensure it’s straight and not bowed. Custom-made doors can arrive with imperfections, complicating the installation process.

Let’s start from the beginning and go through this project in chronological order:

Step 1- Measure The Opening

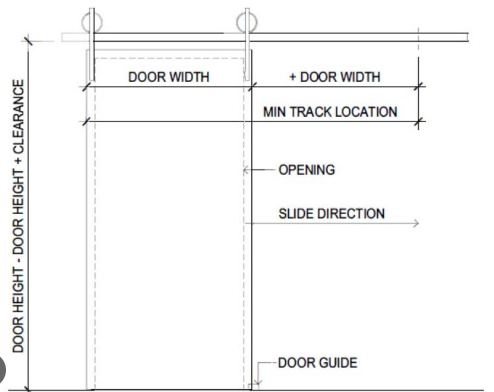
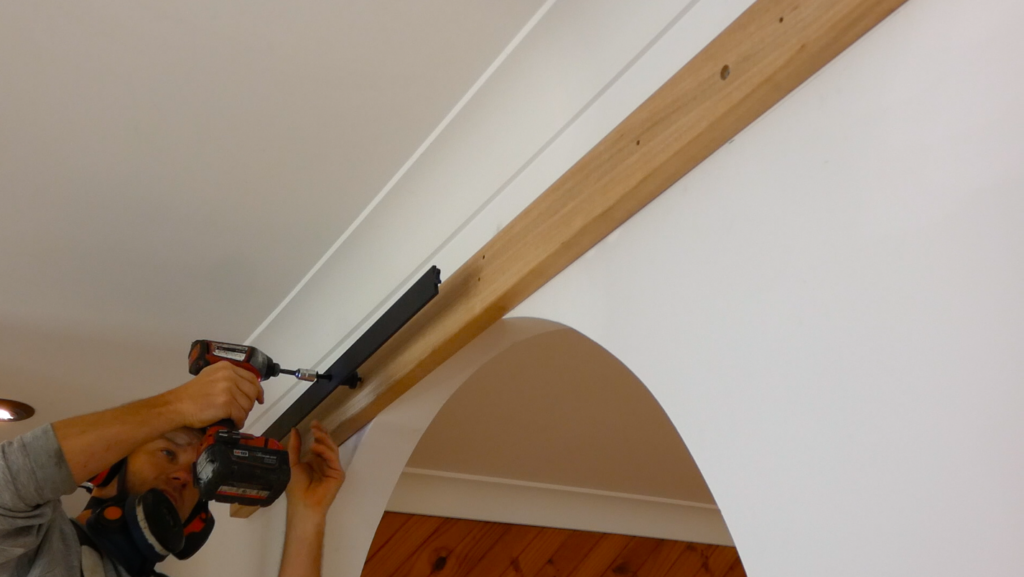
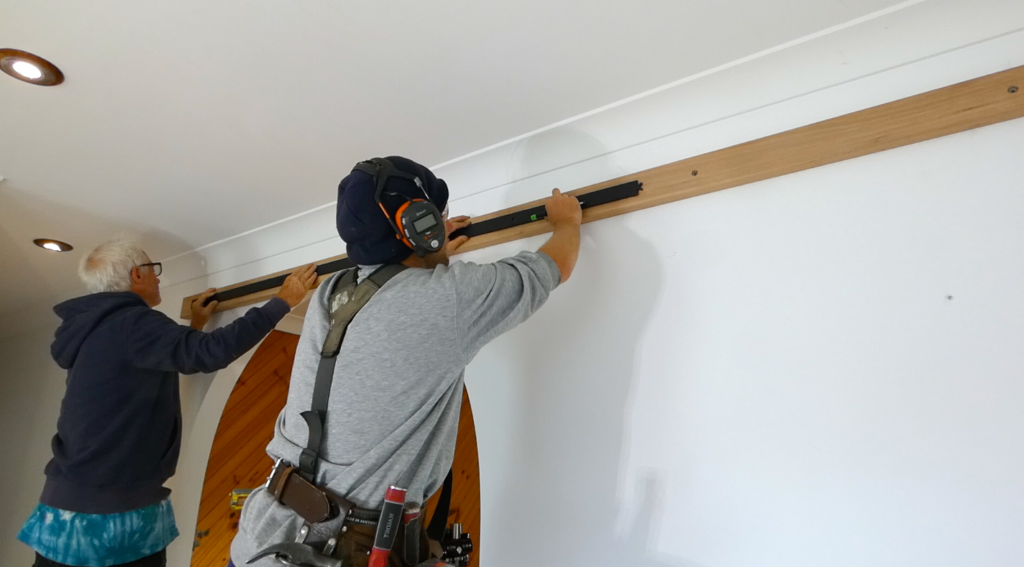
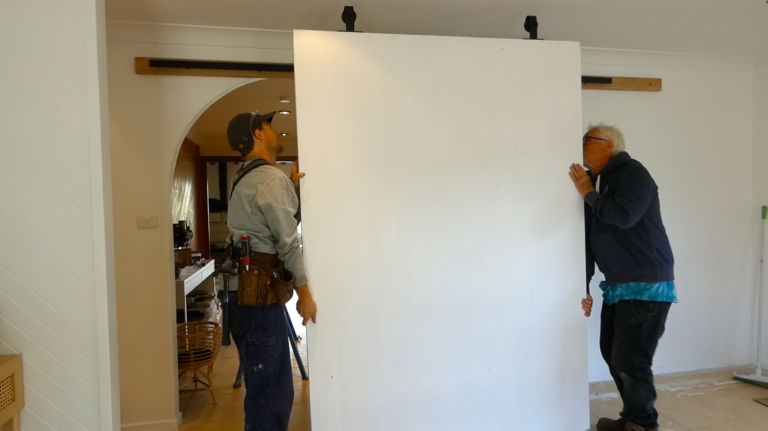
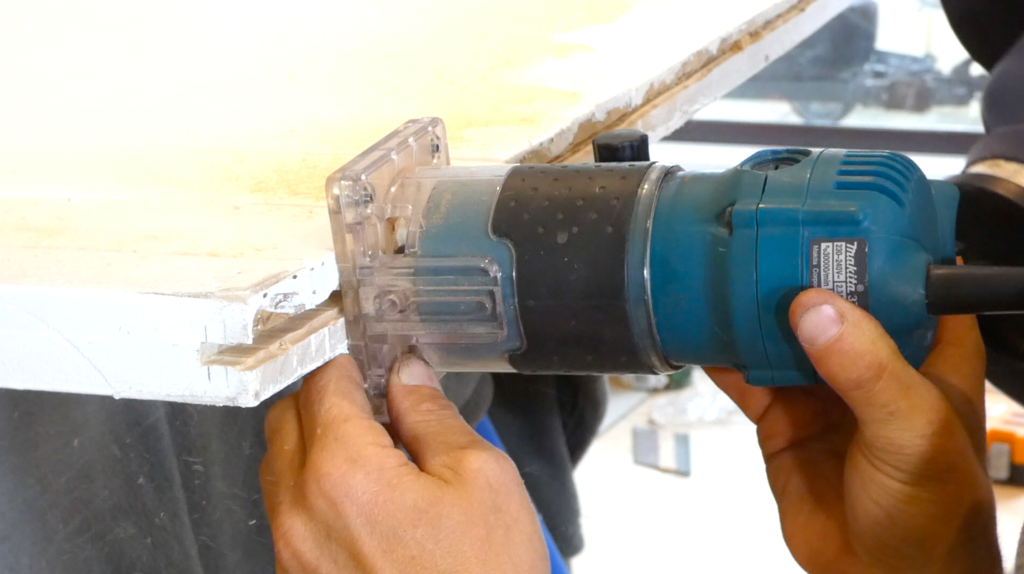
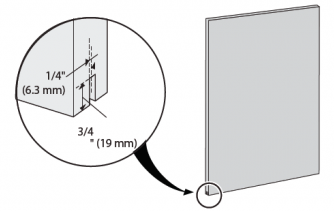
Let’s get into the nitty-gritty of setting up your barn door for success! Start by measuring the doorway opening; we’re shooting for a sweet 50mm overhang on both sides when the door is closed. This overhang not only looks great but also neatly covers the opening. When the door swings open, it gracefully finishes flush with the right side of the opening.

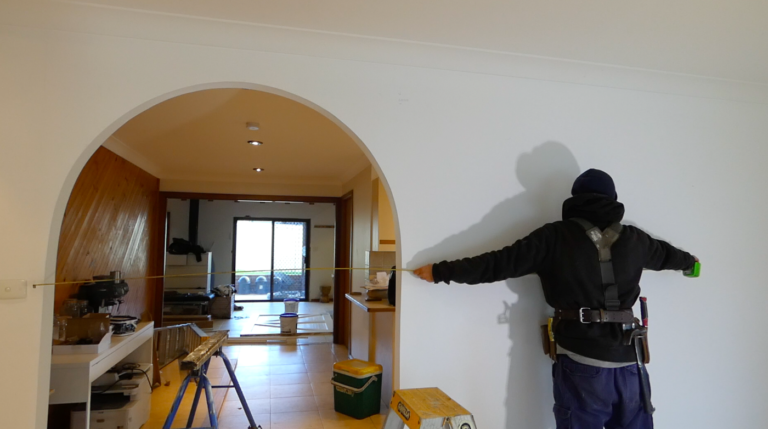
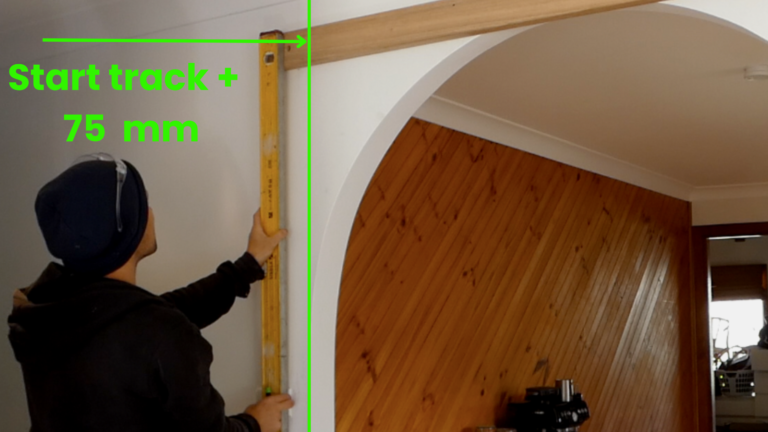
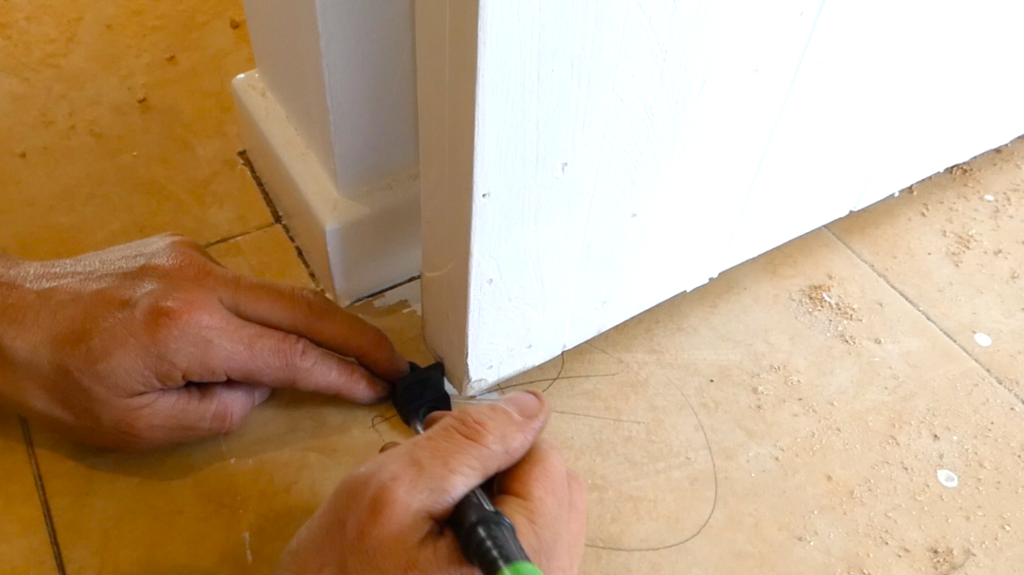
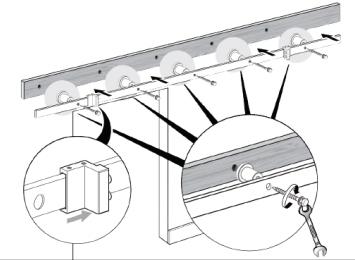
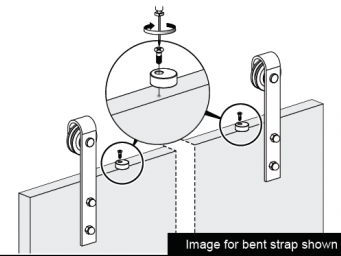
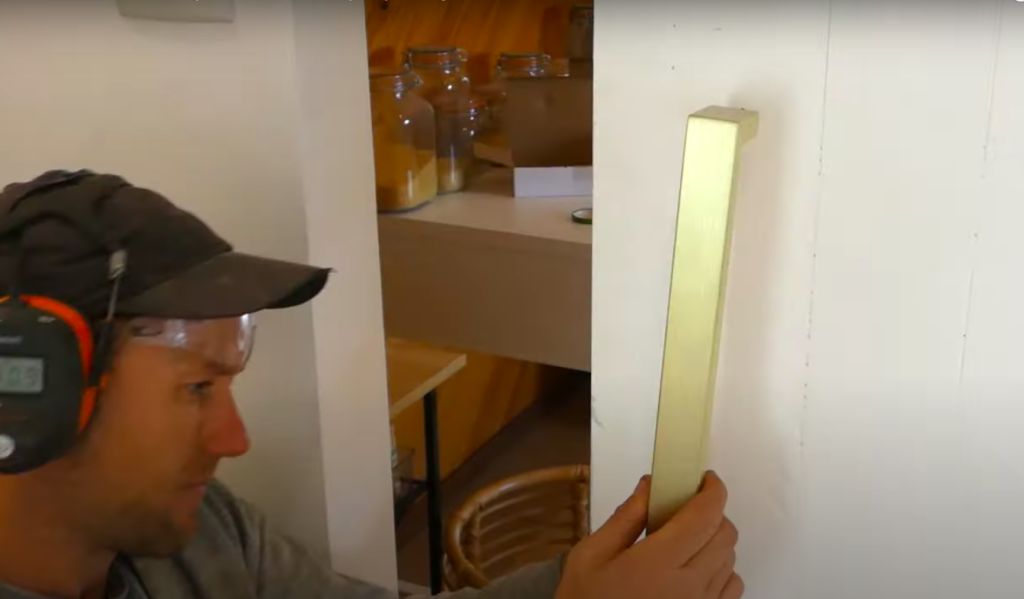
Next up, let’s ensure everything is straight and aligned. Plumb up the opening side of the jamb, and 75 mm beyond this line marks the exciting beginning of your track journey


On the other side of the jamb, add 75 mm and make your mark on the mounting board’s height. This designated spot is the starting point of the track. 

Now, let’s talk studs. The first stud should be a handy 100 mm from the end of the mounting board. Since we’re dealing with a hefty barn door, 1500 mm wide, extend another 1500 mm from the right side of the opening. This extended journey takes us to the closest timber stud, ensuring solid support for your barn door.

Remember to leave a 10mm gap at the bottom once the door gracefully hangs on its track. To guarantee all measurements are on point, employ your trusty level line laser. By working from the highest point of the floor, you’re ensuring a smooth floating experience for your barn door. Skipping this step on an uneven floor might lead to some door-jamming drama. And we surely want to avoid that!

So, measure, mark, and make sure everything is perfectly aligned. Your barn door is on its way to becoming the star of the show in your space!

Plumbing The Opening Side Of The Jamb:

Extend 75mm past the line to mark the starting point of the track on the mounting board. The first stud will be 100mm from the end of the mounting board.

Maintaining a Gap:

Maintain about a 10mm gap at the bottom once the door is hung and on its track. Use a level line laser for accurate measurements from the highest point of the floor to avoid potential door jamming.

Step 2 - Mount The Backing Board:

Alright, let’s delve into the crucial details for setting up your barn door – it’s easier than it sounds. The first order of business: figuring out if you need a mounting board.

 For a timber-framed plasterboard wall, chances are you’ll want one, unless there’s a substantial timber beam hanging out behind the plaster. This board plays a starring role, supporting the barn door and gracefully handling its weight as it glides along.


Hardwood Mounting Board

Now, let’s talk aesthetics. Since my barn door rocks a rustic vibe, I’m opting for an exposed hardwood mounting board to keep that charming rustic finish intact.

To get everything lined up perfectly, find the centerline of the track by adding a neat 43 mm to the door height. My door stands at a cool 2100 mm, making the centerline of the track a sweet 2143 mm from the highest point of the floor. Using a 90 mm mounting board, I’ll make my mark 45 mm down from the center line, establishing the bottom height of the board.

Here’s the lowdown: calculating the mounting board’s height and position involves a bit of math magic. First, work out the sliding track’s height – door size, plus another 43 mm to find the center of the track. Keep in mind, my floor is getting a 6mm vinyl flourish, so I’m factoring that into my track height strategy. While the standard height for a barn door is a good guide, always double-check those installation instructions for the exact measurements.

With these key details in mind, bear with me – I’m simplifying the process to make it a breeze. I’m envisioning a backing board symmetrically centered on the sliding track, ensuring our barn door steals the spotlight effortlessly. Ready for the next step?

Finding the Studs: Barn doors are heavy and need proper support. Attach the mounting board securely to timber studs using 100mm bugle screws for extra strength.

Aligning the Mounting Board: Use a laser level to mark the mounting board’s position in a level straight line. Mark the timber studs on the wall for precise installation.

Transferring Stud Positions to the Backing Board: Transfer stud locations onto the backing board, ensuring the track finishes 75mm past the opening. Pre-drill, counter-sink, and sand the mounting board for easy lifting into position.

Securing the Mounting Board: Pre-drill all timber stud locations to secure the backing board to the wall. Lift the backing board into position with an extra set of hands and drill and screw it into the level position.

Step 3 - Attach The Metal Track:

Let’s dive into the hands-on part of this barn door project! Armed with spacers, lag bolts, and washers, it’s time to mark and attach the track to the mounting board. Ensure it’s all aligned and snug, then give those bolts a good tightening with a trusty socket.

Here’s a friendly tip based on my own experience: I almost missed marking the track’s hole locations on the mounting board when it was perched on the saw stools. A little oversight, but a crucial one! So, take a mental note for your next barn door adventure – mark those hole locations before you move the mounting board. We’re all learning as we go, right? Happy DIYing!

Learn how to build timber stairs for deck here!

Step 4 - Attach The Rollers To The Door:

Now, let’s dive into the exciting part – attaching the rollers to the door! It’s a breeze, really. The process is as simple as securing two screws for each roller right onto the top of the door.

Just follow the provided template, and you’ll be smoothly guiding those rollers into place. Here’s a tip: when you drill through the face of the door, you get a sturdier design. Personally, I lean towards this robust option. However, it’s worth noting that these rollers rely on the screw thread to bear the weight of the door. It’s the hardware I’ve got, so I’m making it work with some heavy-duty bugle screws for that extra-strong grip.

For the perfect placement, I’ve installed these rollers 150 mm from each end of the door, securing them with two sturdy 75 mm 14-gauge bugle screws. This meticulous installation ensures not just functionality but also the long-lasting durability of your barn door. 

Step 5 - Hang the Door for Rebate Position:

Before diving into the process of rebating the bottom of the door for the door guide, I want to take a moment to install the door and ensure that all the heights and set-outs are spot-on.

Happy with the door’s smooth and free-sliding performance, I’m ready to mark the bottom of the door for the precise placement of the door guide. This step involves confirming both the depth and position of the rebate that I’ll be cutting into the bottom of the door.

Step 6 - Straightening A Bowed Door:

In an attempt to address the bow in this door, I opted for a straightforward solution—laying the door flat with some weighty tubs of paint for a few days. Unfortunately, this method didn’t quite straighten the door as expected. While it’s not ideal to have a noticeable bow in a sliding door, the clients are determined to proceed with it, and I’m still confident that I can make it work.

Even though I’ll need to work some magic during the installation process, considering the door’s custom creation by a joiner from another state, the clients are not overly concerned. Despite the challenge, I’m optimistic about achieving a successful outcome and making the most of the unique character of this specially crafted door.

Step 7 - Cut A Rebate For The Door Guide:

To create a neat guide for the door, I’ll begin by running a straight line along the center of the bottom, spanning from one end to the other. Marking up 20 mm signifies the depth of the rebate, and I’ll ensure the width of the rebate is a precise 5 mm.

Considering the door’s unique curvature, using a trimmer or saw guide won’t suffice. Instead, I’ll kick off the process with my small circular saw, executing a freehand cut along the center line at the correct depth. Two initial cuts will pave the way for the finishing touch, using a 5mm cutter bit in my trimmer to complete the door guide rebate.

This well-crafted rebate in the bottom of the barn door serves a crucial purpose. It allows the floor-mounted guide to smoothly direct the door during both opening and closing, ensuring a seamless operation.

Step 8 - Screw The Door Guide To The Floor:

Let’s secure the door guide to the floor with a couple of plugs and screws. Ensuring the optimal functionality and alignment of your sliding barn door involves a few key steps. Start by sliding the door fully open to assess its accurate positioning. 

For confirmation, measure the gap between the door and the wall at both the top and bottom sections—consistency in these measurements is vital, indicating that the door is hanging perfectly straight.


Cut A Straight Guide In the Bottom Of the Door

Now, it’s time to integrate the floor guide into the groove at the bottom of the door. This component plays a crucial role in stabilizing the door’s movement and preventing any unwanted swaying.

 Carefully mark the precise locations on the floor where you’ll secure the floor guide. Accuracy in placement is paramount for the smooth operation of the door.

Once you’ve marked the spots, proceed to drill holes into the floor. With the holes in place, secure the floor guide firmly. This ensures not only the door’s stability but also minimizes any unnecessary motion during usage. Following these steps diligently will greatly contribute to the smooth and reliable operation of your sliding barn door.

Hang The Door

Team up with a friend for a smooth and enjoyable installation experience as you gently lift the door onto the track. Once in position, work together to carefully push the anti-jump blocks into their designated spots, tightening the screws securely. 

With the teamwork in action, slide the door along the track effortlessly, and pause to ensure the stoppers are firmly in place. This collaborative effort and attention to detail will ensure a seamless and secure operation of your sliding barn door.

Install Anti Jump Blocks

To boost the functionality and safety of your sliding barn door, installing anti-jump blocks at both ends of the tracks is key. These blocks play a crucial role in preventing the door from slipping off the track, especially if it’s slid too far.

For a proper installation of the anti-jump blocks, kickstart the process by measuring 35mm from the inside of the rollers and 7mm from the face of the door. Ensure precision by marking these measurements on both ends of the track. The next step involves pre-drilling holes at these designated points to securely install the blocks, ensuring a stable and reliable sliding door system.

Install The Handle

After successfully installing the door and ensuring its smooth sliding motion, the final step involves attaching a handle. I’m using a double-sided 300mm gold handle, which facilitates effortless door operation from both sides. This addition enhances both functionality and aesthetics, providing a convenient grip for seamless sliding.

Conclusion

And that’s a wrap! The door should now slide smoothly, separating two parts of a building without compromising floor space. Until next time, keep building, keep creating, and most importantly, enjoy the process! Thanks for joining me on Greysand.

Leave a Comment

Your email address will not be published. Required fields are marked *

2 × two =