Welcome friends! In this post we embark on a practical journey on how to build stairs for a deck together. We will start with the design and then build a simple yet functional flight of outdoor stairs.
This guide is meticulously crafted for both beginners and seasoned DIY enthusiasts alike. By providing a comprehensive look into the calculations, markings, construction, and installation processes needed to bring your staircase to life.
With a focus on clarity and accessibility. I’ll breakbdown the essential mathematical formulas required for building any type of staircase. These formulas are the backbone of staircase design, adaptable to fit the unique design details of your project.
Drawing from my personal experience, the article will start with what I consider the simplest style of staircase construction. I highlight the important details and basic mathematical principles involved in the process.
To ensure you’re well-equipped to tackle this project, I’ve included detailed descriptions, complemented by illustrative drawings though-out this post.
Timber Stair Building Made Easy
This guide is designed not only as a one-time tutorial but also as a lasting resource you can return to whenever needed. Whether you’re creating your first set of outdoor stairs or looking for a thorough refresher on the essentials of staircase construction. This post (and the accompanying video) aims to be your go-to reference.
Calculate The Number Of Stairs Risers And goings
The first step in constructing a staircase involves calculating the number of risers and treads. A riser refers to the vertical height of each step, while a tread, also known as the going, is the horizontal width of each step.
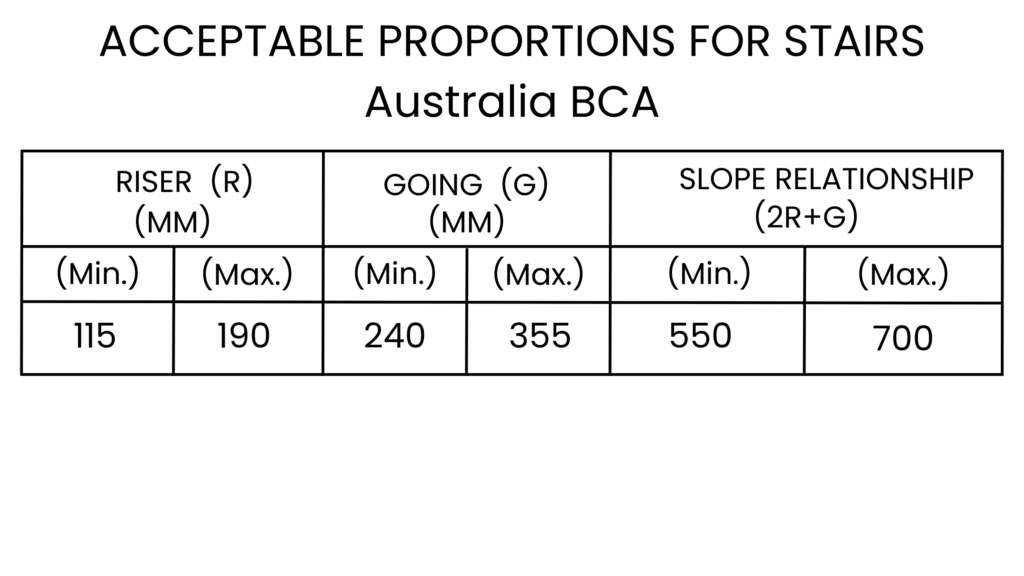
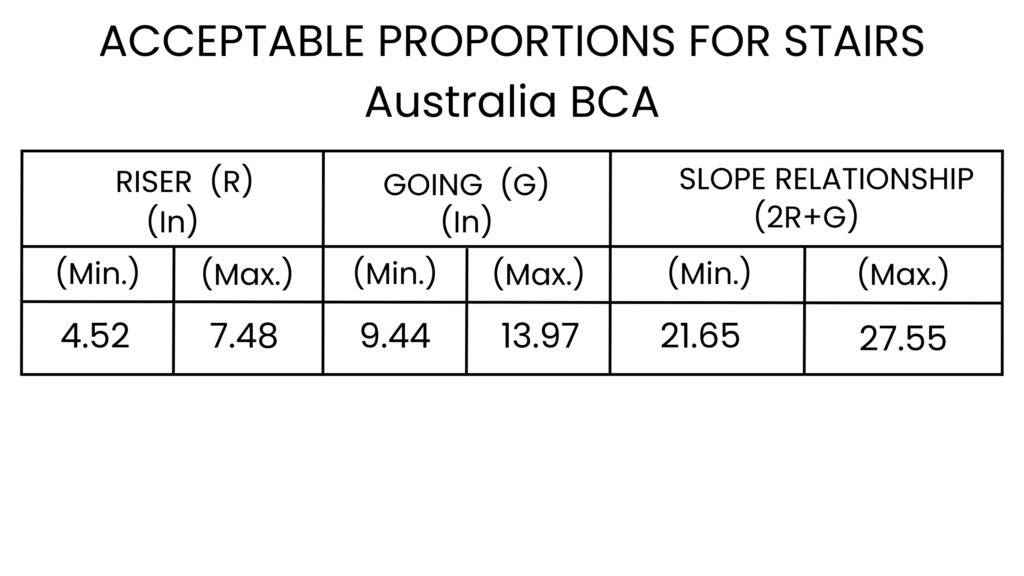
It’s important to ensure there is an equal number of risers, with the number of treads always being one less than the number of risers. The acceptable dimensions for risers and treads can be found in the table provided. I have included this table to illustrate the minimum and maximum sizes for stair treads and risers.
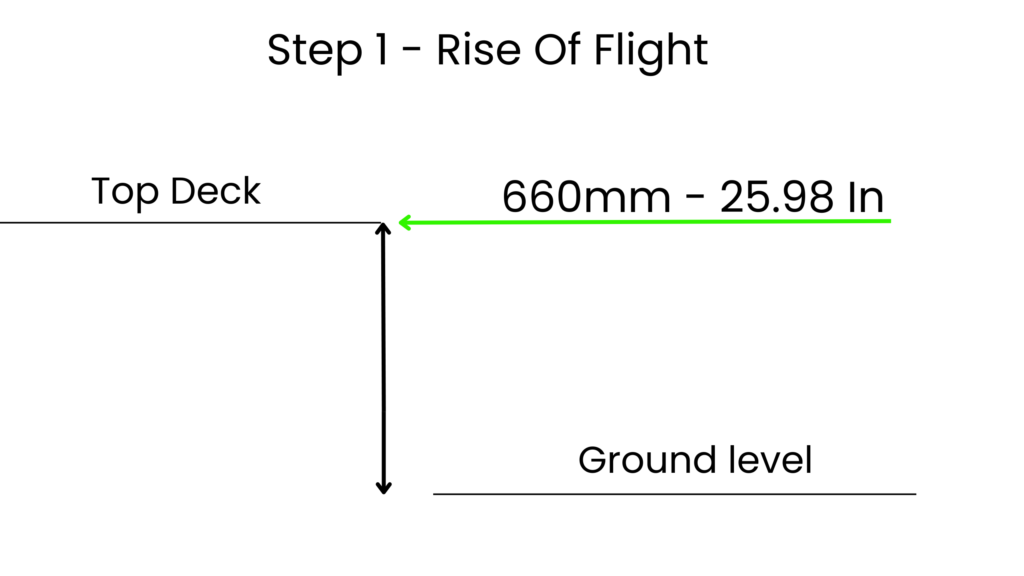
To begin, I will determine the total rise of the staircase. This is measured from the top landing of the stairs to the ground level where the stairs start. For this project, the total rise is 660 mm.
Simple Out Door Stair Math Formulas
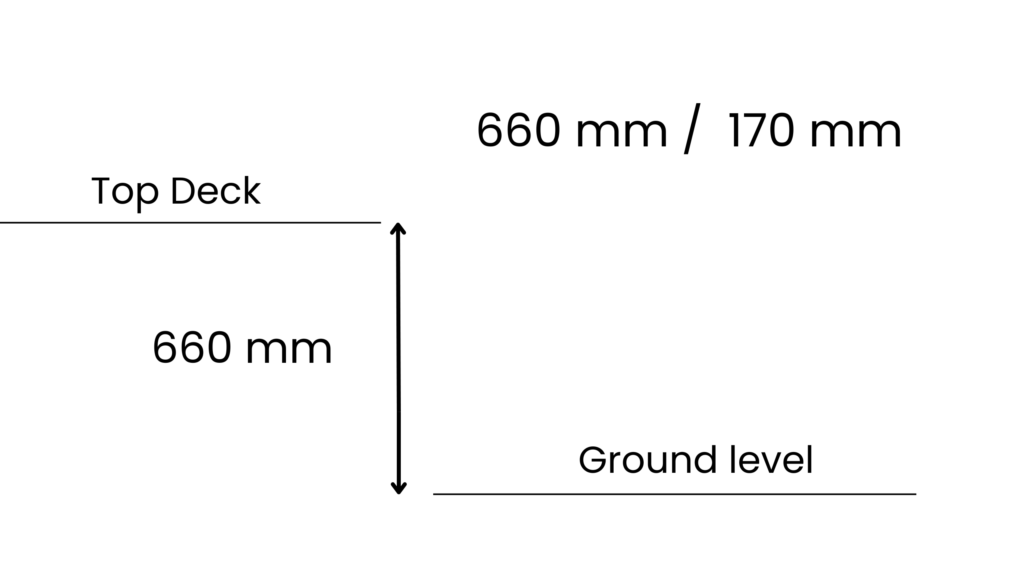
Next, I will determine the height of each riser. To establish the number of risers, I’ll start by dividing the total rise of the stairs by an average outdoor riser height, which is approximately 170 mm.
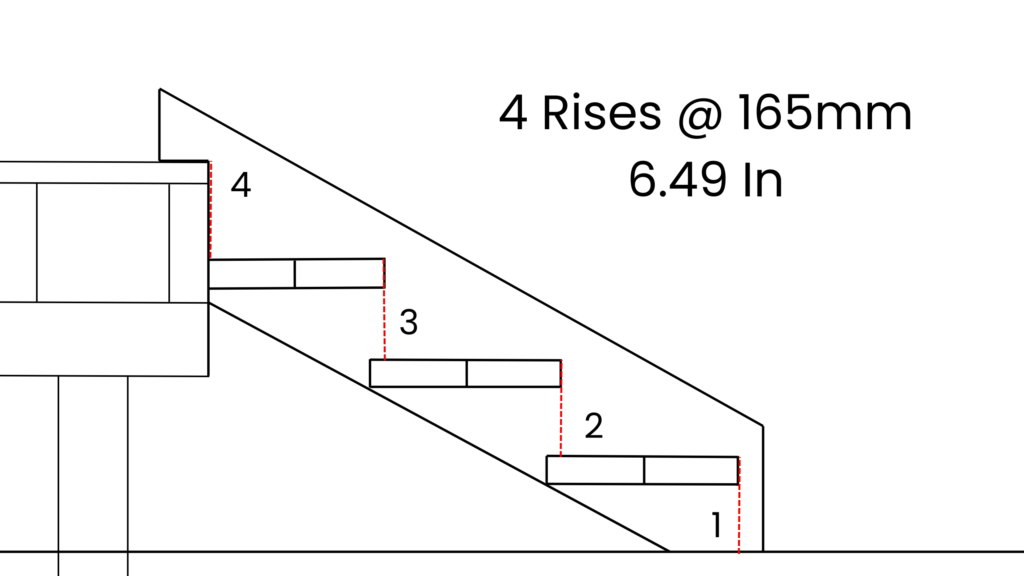
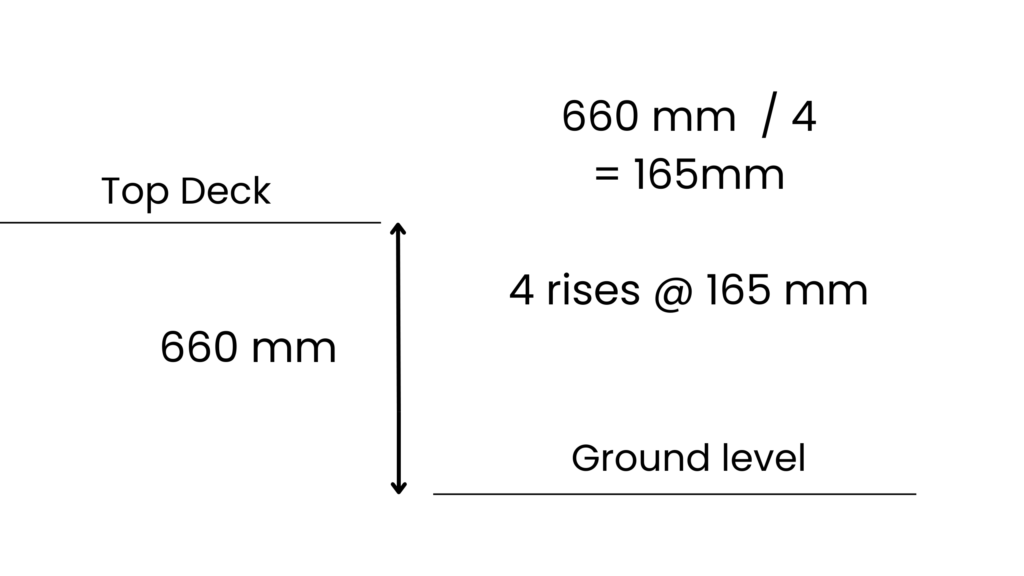
By dividing 660 by 170, we get 3.8. Since the number of risers must be an equal whole number, I will round up to the nearest whole number, resulting in 4 risers. Therefore, 660 divided by 4 equals 165 mm for each riser.
This means there will be 4 equal risers measuring 165 mm each, extending from the ground level to the top stair landing. Consequently, this set of stairs will feature 4 risers of 165 mm each, leading from the ground level to the deck height.
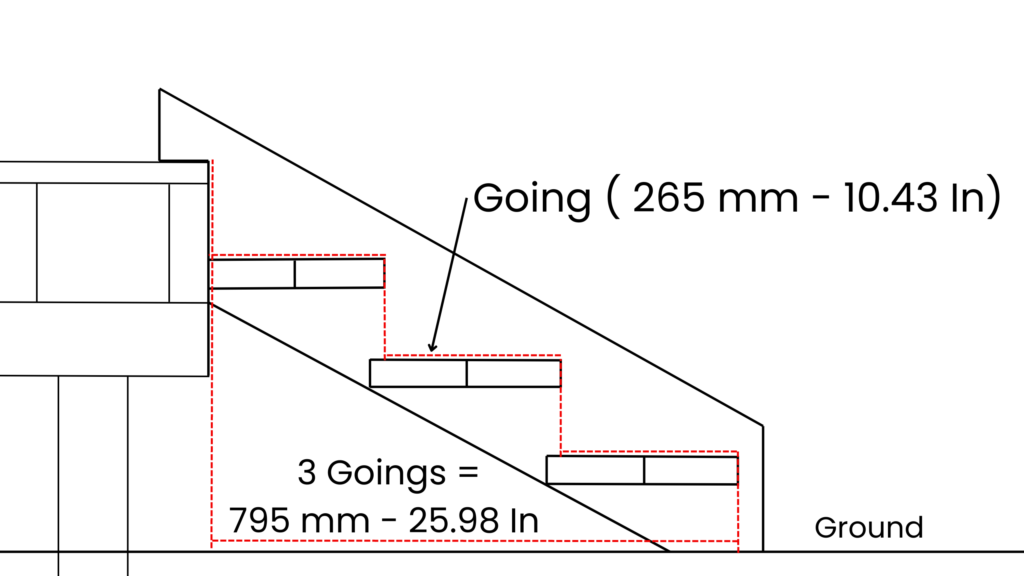
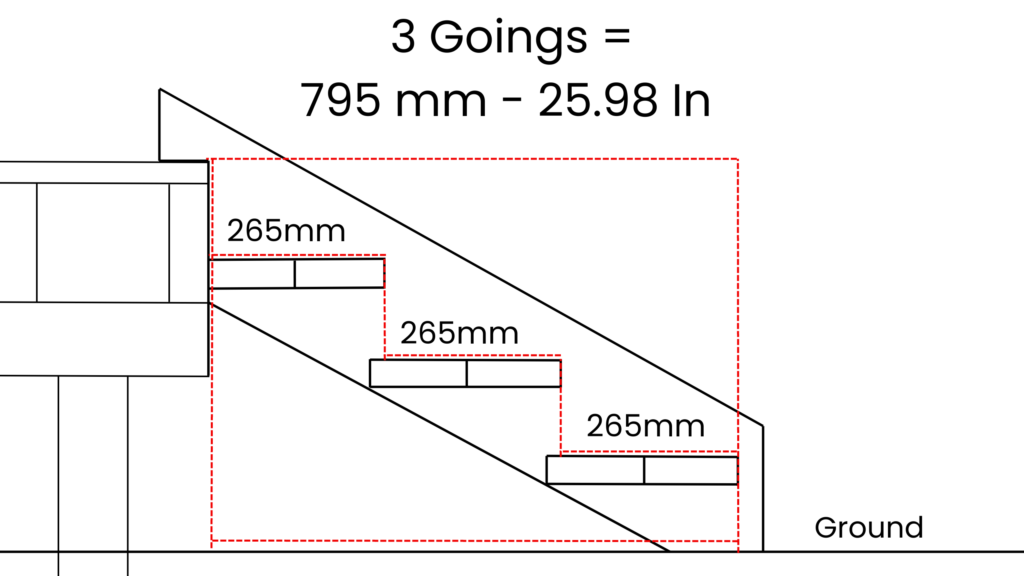
The next step involves calculating the number and size of the treads (also known as the goings). Since there is always one fewer treads than there are risers, we will have 4 risers and 3 treads.
These rise and tread measurements are marked onto the timber stringers. Which are the pieces of timber that run diagonally along the sides of the stairs. The treads are attached to these stringers, which support the weight of the treads.
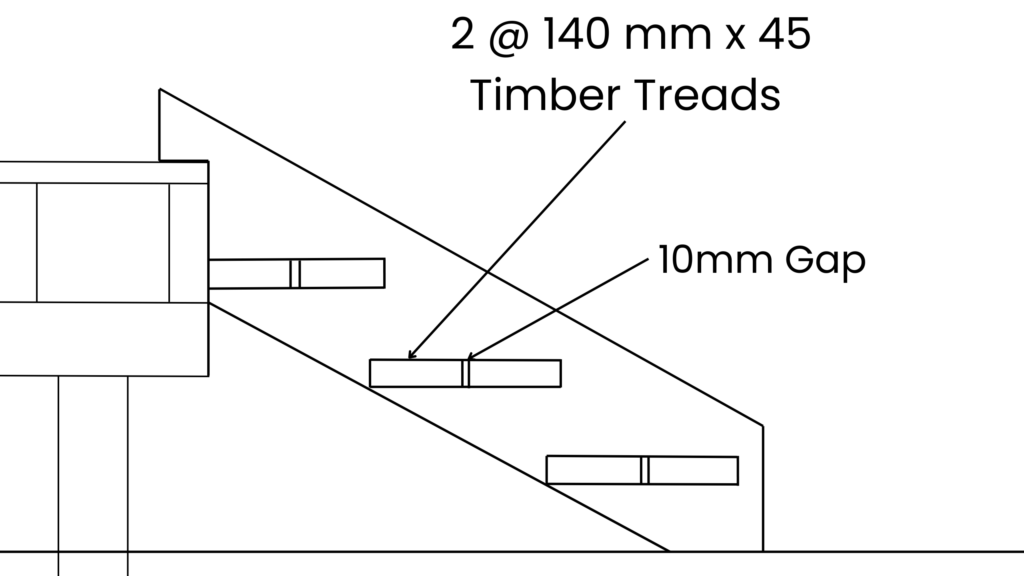
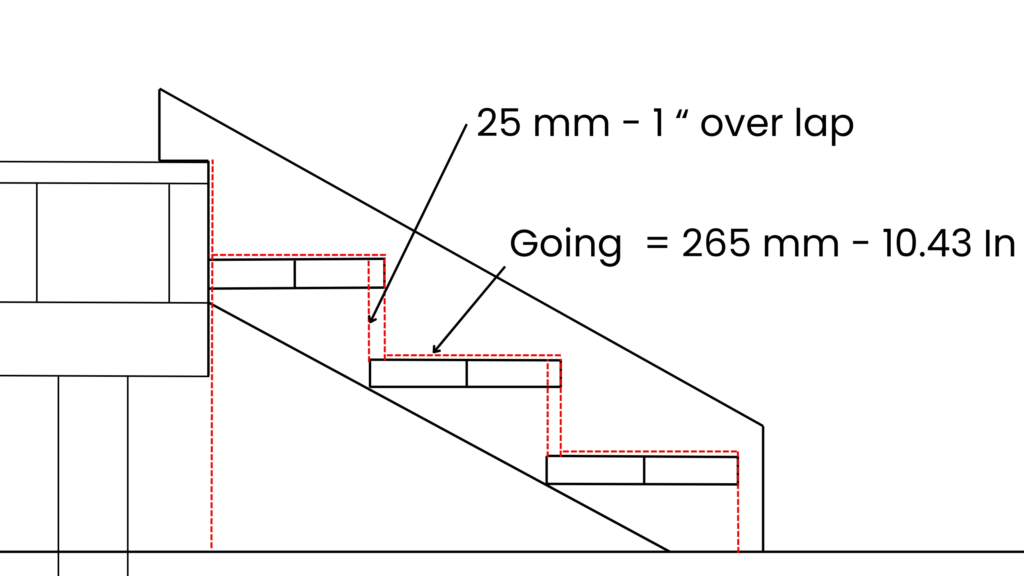
I am not constrained by a specific landing point so I have opted for a 265 mm tread with a 25 mm overlap. This will be accomplished by using two pieces of 140 x 45 timber with a 10 mm gap for each tread.
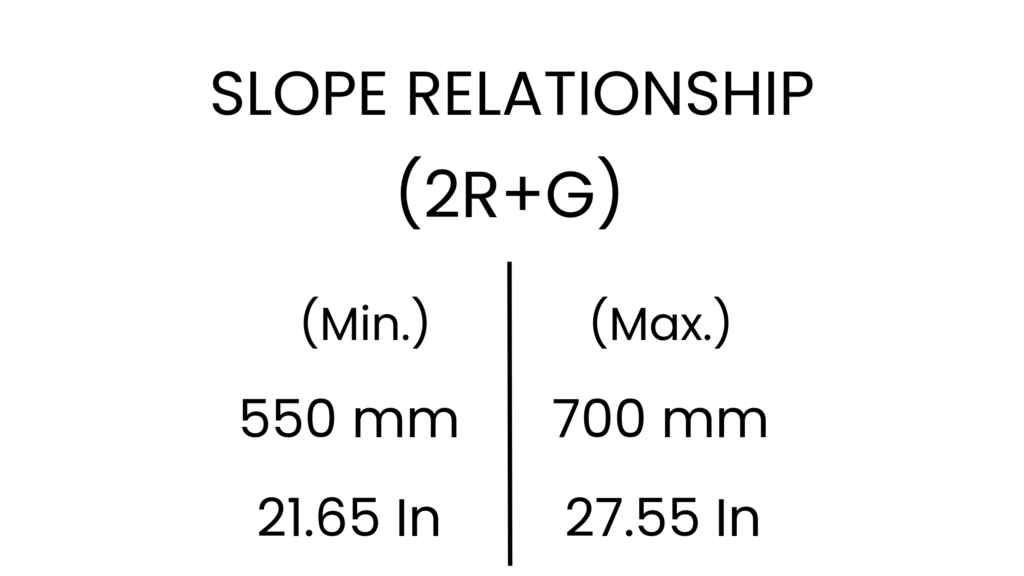
To ensure the stairs adhere to the acceptable slope ratio, we will apply the formula (2R+G), where R represents the height of the risers and G represents the depth of the going (tread). The total should fall between 550 mm and 700 mm.
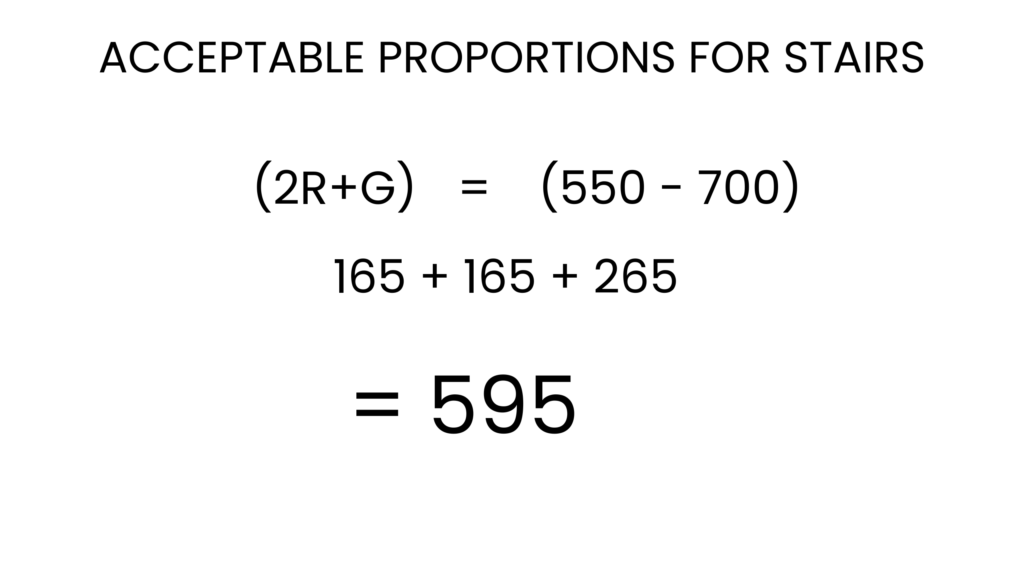
This calculation is crucial for confirming that the stairs are both comfortable and safe to use, as well as compliant with building codes. Applying our measurements: (2R+G)
2×1652×165 (riser height) + 265 (going depth) = 595 mm.
This result of 595 mm confirms that our stair dimensions are indeed within the acceptable range.
Formula for Calculating The Length Of The Stringer
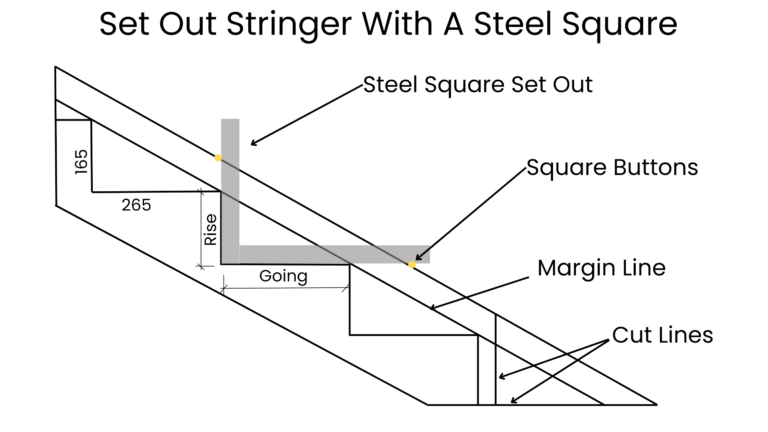
Now that I have all the calculations worked out, I can begin by marking the positions of the treads onto the timber stringers.
The measurements for the rise and the tread (going) are carefully marked on the stringer. Stringers are the pieces of timber that run diagonally along the sides of the stairs, to which the treads are attached. These stringers are crucial as they bear the weight of the treads.
If you continue watching, I’ll explain a bit later how to calculate the size of the stringer needed.
Next, I’ll quickly show you the formula for calculating the length of the stringer required.
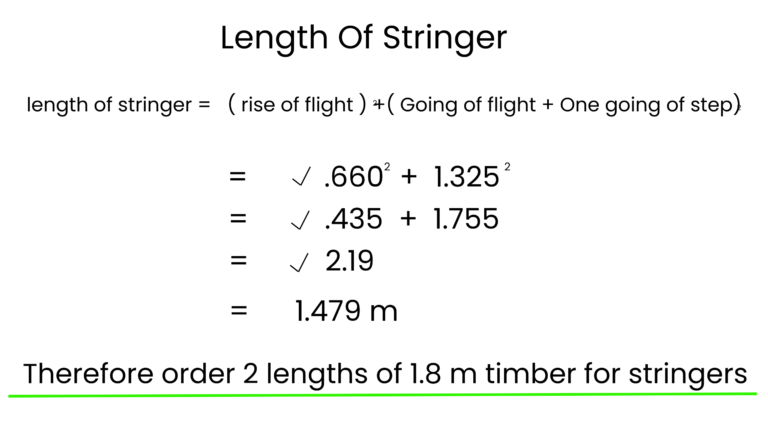
To calculate the length of the stringers needed to construct the stairs, I use the following calculation:
Square the rise of the flight, and separately, square the total length of the goings, including one additional going.
Add these two numbers together, then find the square root of this total.
This calculation will give me the length of the timber stringers I need to purchase. I usually round this up to the next available timber length size.
Stay tuned for a more detailed explanation on determining the exact size of the stringer.
Mark Out The Stringers
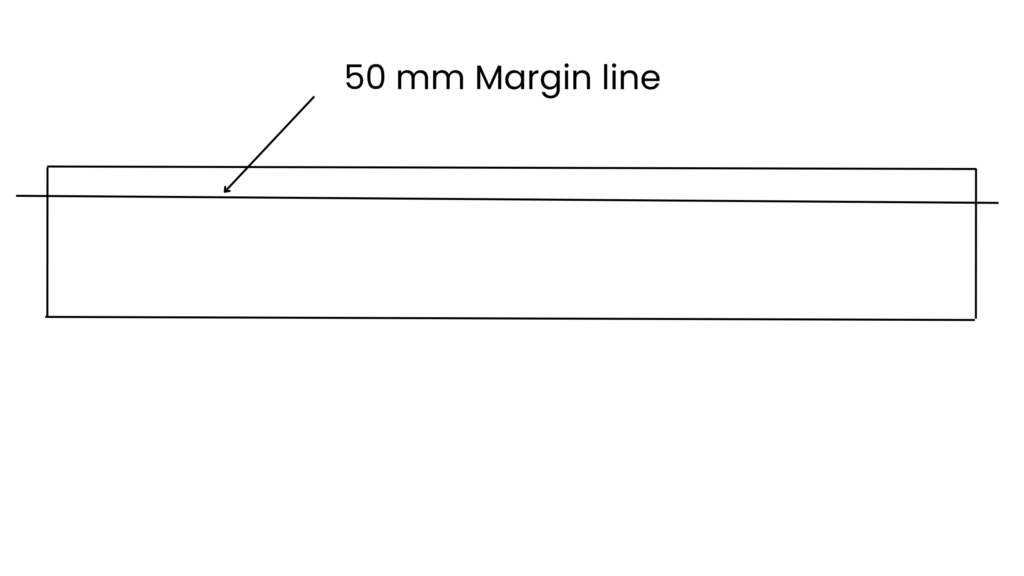
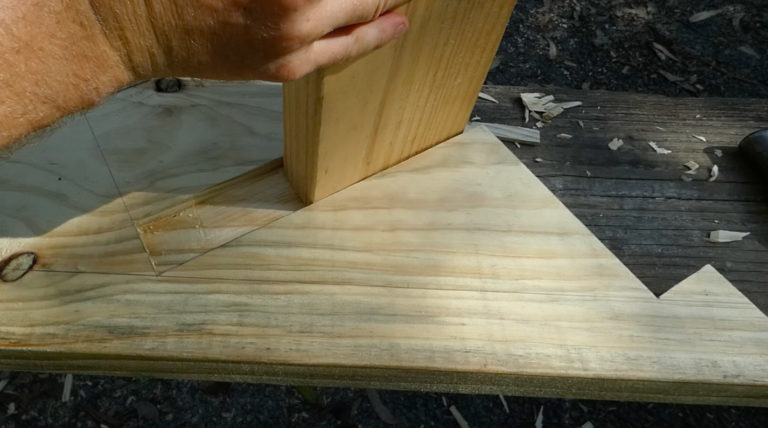
Now that the calculations are complete, I can proceed to the next step, which involves marking the positions of the treads on the timber stringers. I will mark a 50 mm margin line along the inside length of the stringers.
Starting from one end, I will mark the positions for the going (tread depth) and rise (tread height) on the stringer, ensuring to account for the point of attachment notch. This notch is critical as it is where the stairs will sit and attach to the landing.
These initial set out positions indicate the top of each tread and the face of each riser.
After marking the tops of the stair treads, I will proceed to delineate the point of attachment notch at the top and the cutoff positions at the bottom.
I prefer to extend the end of the stringer 50 mm beyond the last riser to align with the margin line.
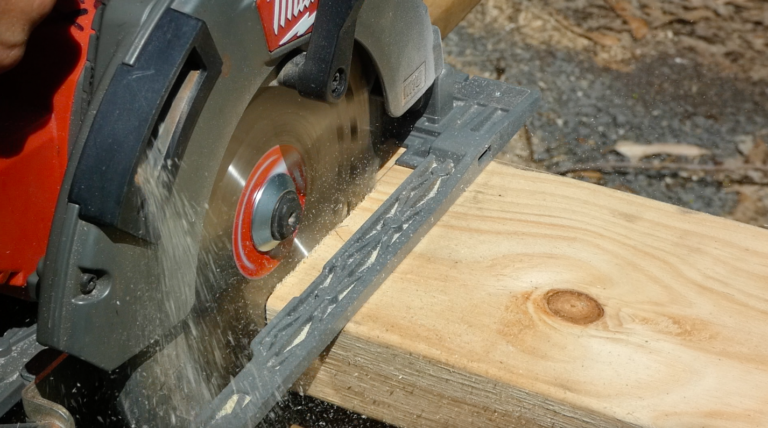
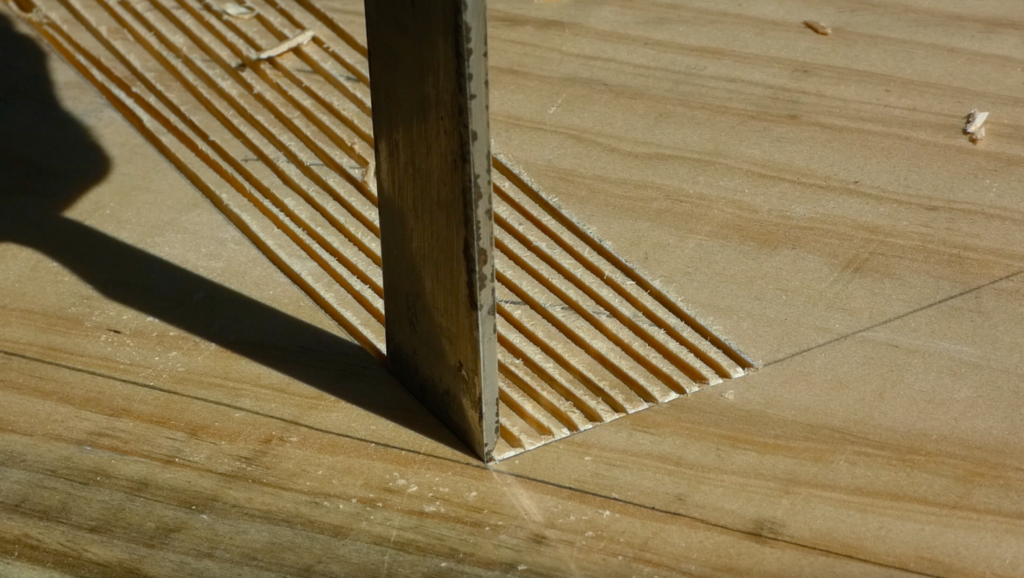
Next, I will accurately mark the front and bottom tread positions on the stringer, as precision is crucial for the following step, which involves creating housings for the tread locations in the stringers using a circular saw and a sharp chisel.
I cut the stringer to the correct size, beginning with the bottom level and plumb cuts before moving on to cutting out the point of attachment notch.
Using the first stringer as a template, I mark the length on the opposite side, then repeat the marking process on the opposite stringer.
Cut The Timber Treads To Length
Before rebating all the tread positions, I cut the timber treads to length. Since there are three goings, I need six lengths of the tread materials, each cut to 900 mm.
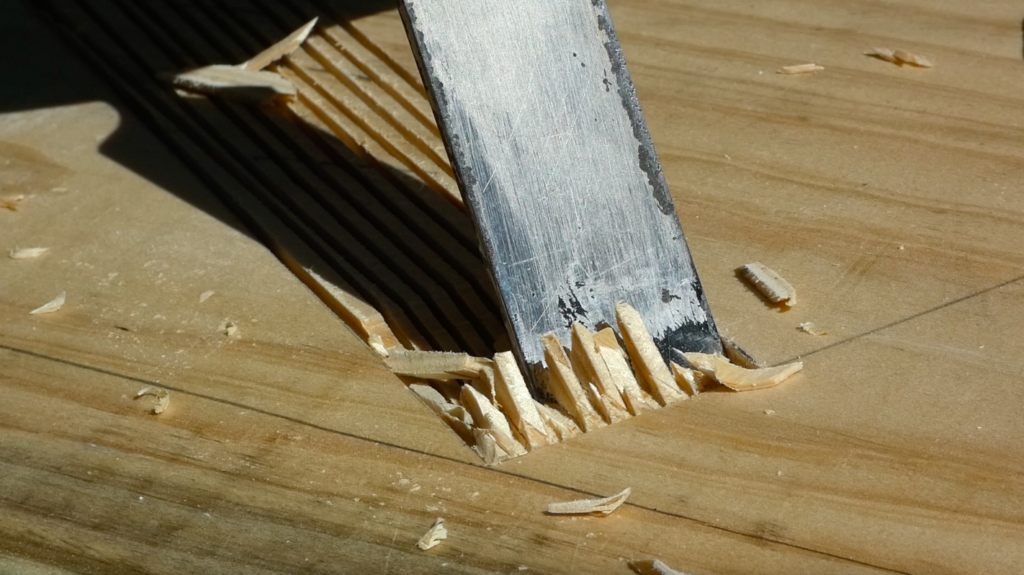
House The Treads Into Stringer
I adjust my saw to a depth of approximately 12 mm and make cuts through the tread positions, spacing them about 5-10 mm apart. This enables me to easily notch out the timber rebates with a sharp chisel.
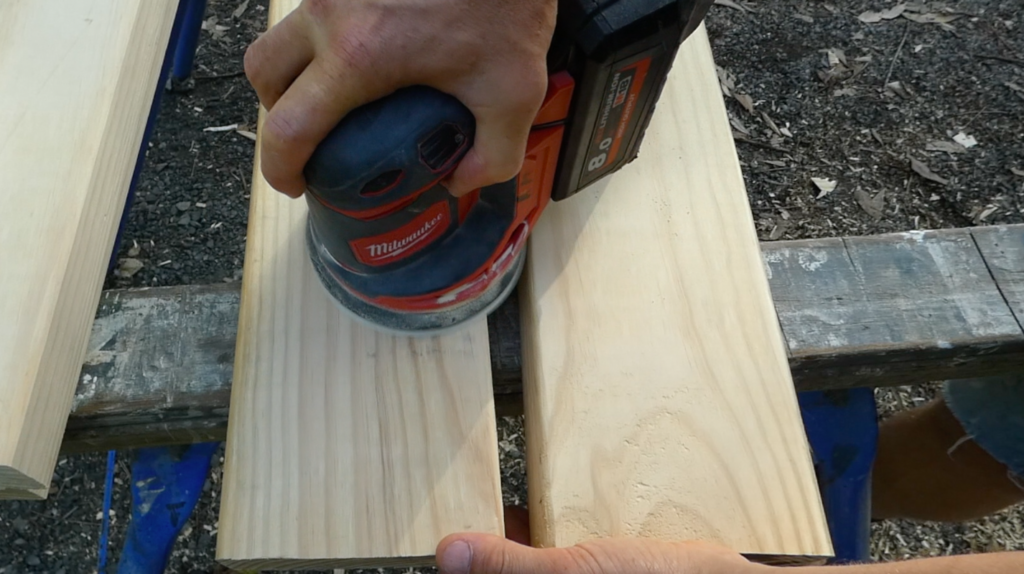
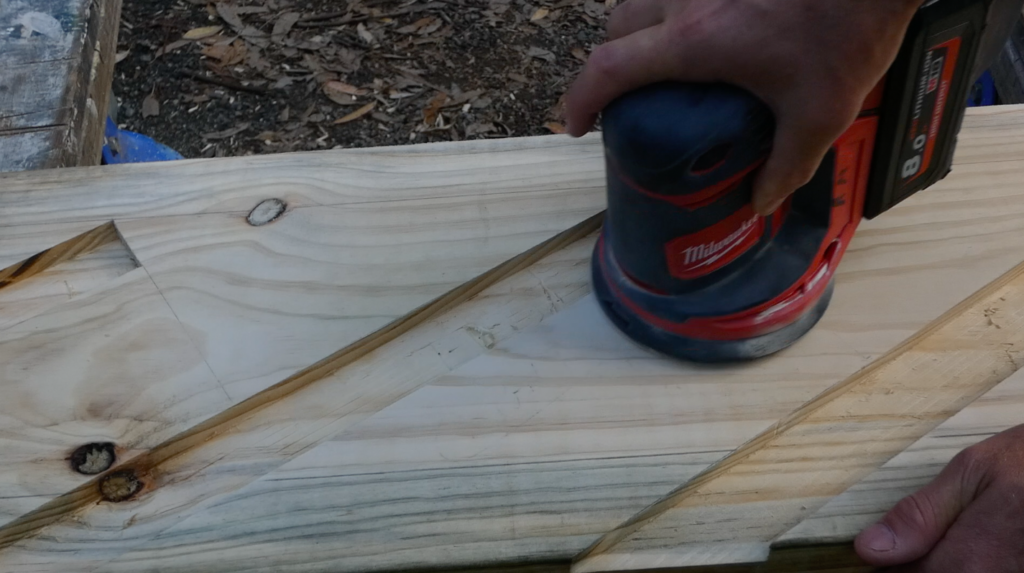
Sand Timber Stringers And Steps
Once all the tread positions are rebated, the next step is to lightly sand all the timber with an orbital sander.
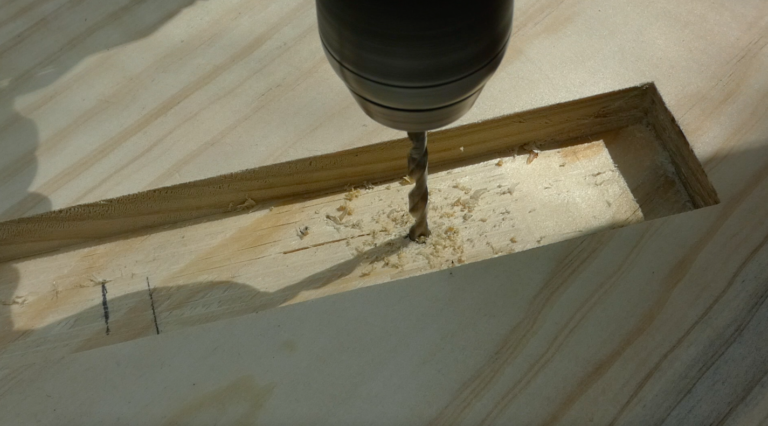
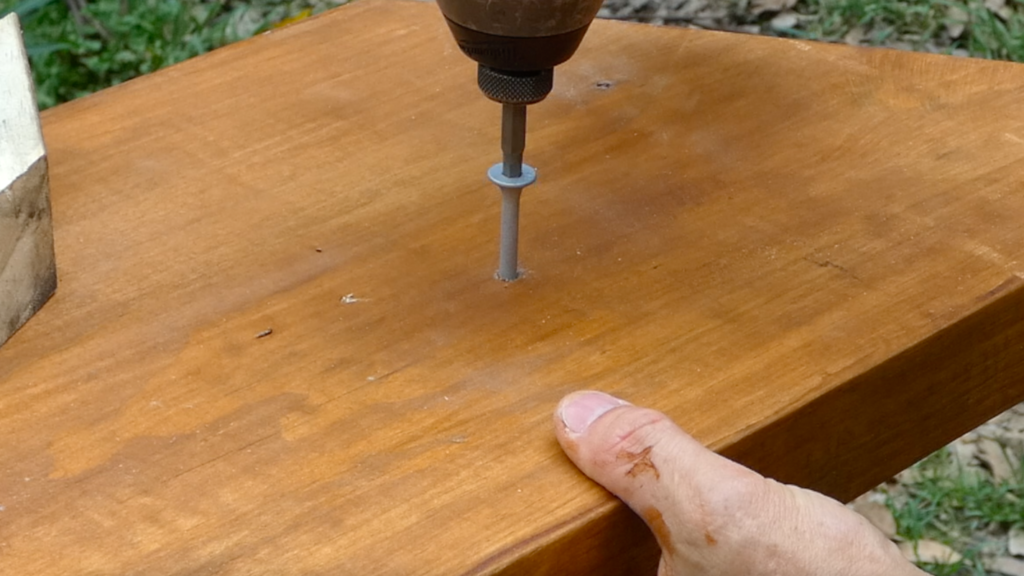
Step 6 - Pre- Drill The Stringers
Once everything is lightly sanded. I determine the center of each tread position and drill a 5mm hole from the inside of the stringer. This allows me to easily use bugle screws to assemble the stair components
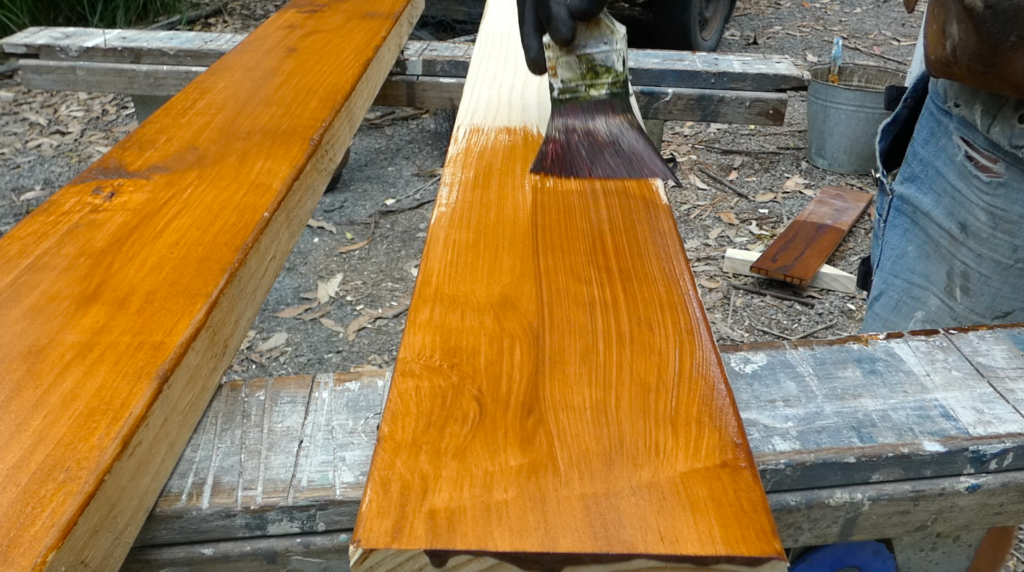
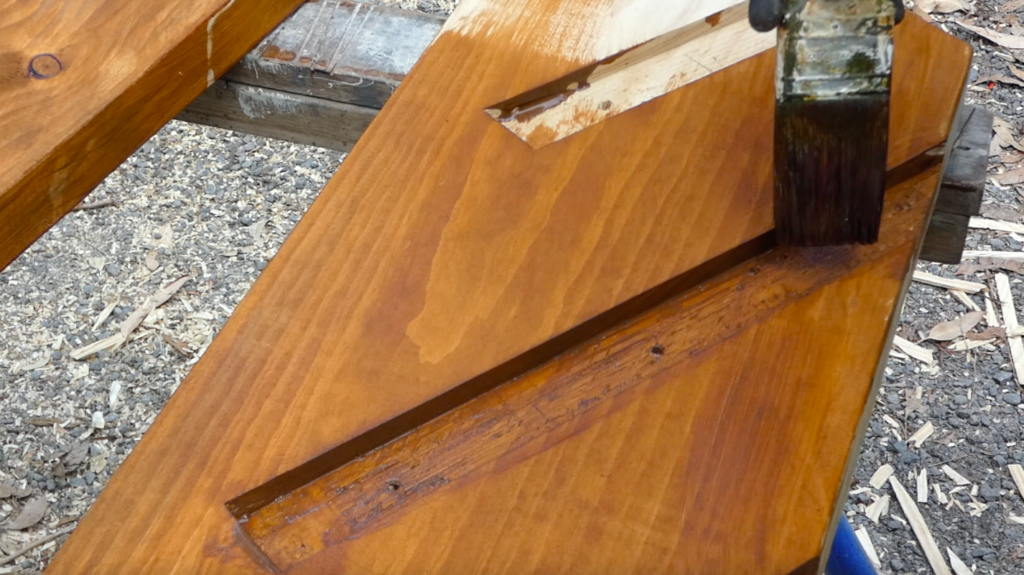
Oil Timber Treads And Stringers
Next, I apply a couple of coats of decking oil to provide the timber with extra protection from the elements. This also helps to match the timber to the marabou decking, ensuring a consistent color throughout.
Install Treads Into Stringers
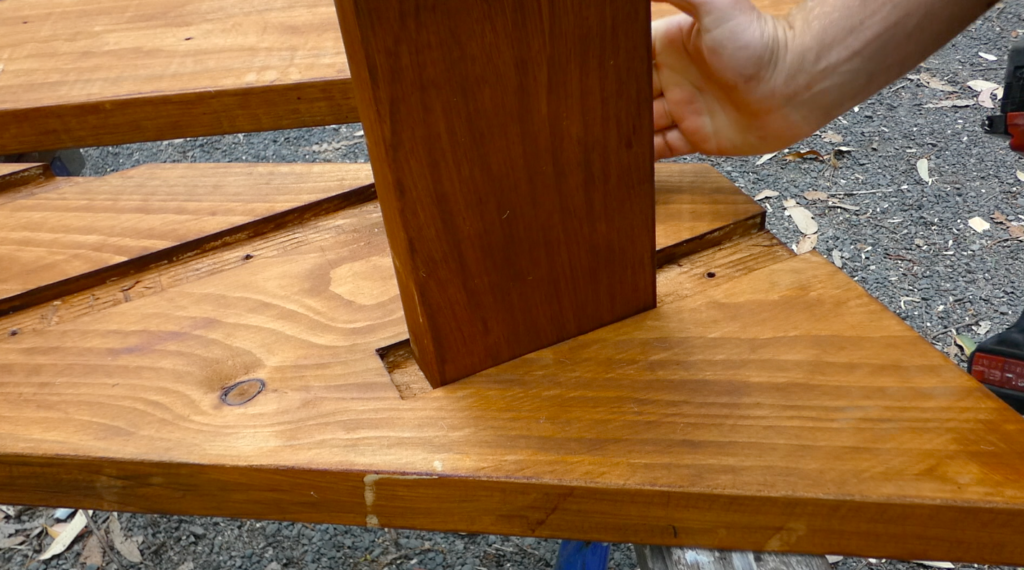
To assemble and attach all the stair components together, I slide the treads into position. Then secure each tread to the stringer with a 100 mm bugle screw from each end. Utilizing the pre-drilled holes I made earlier. The bugle screws will firmly hold the stairs together, but I also add two lengths of threaded rod for additional stability.
Since the last step/tread will be flush against the face of the deck, resulting in no overhang, I trim the last tread to fit perfectly into the face of the deck.
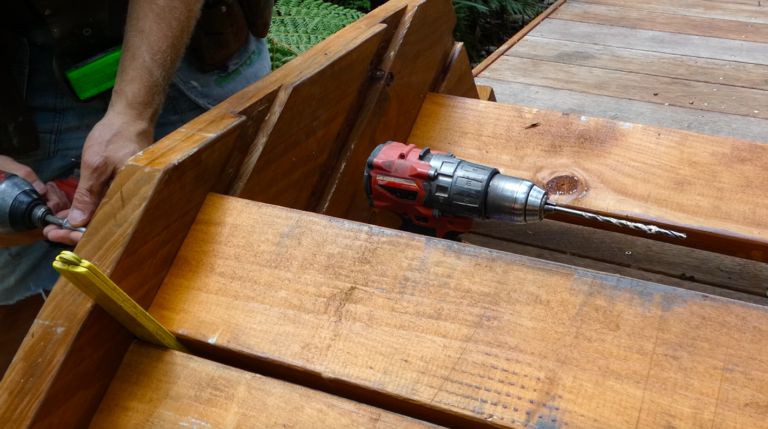
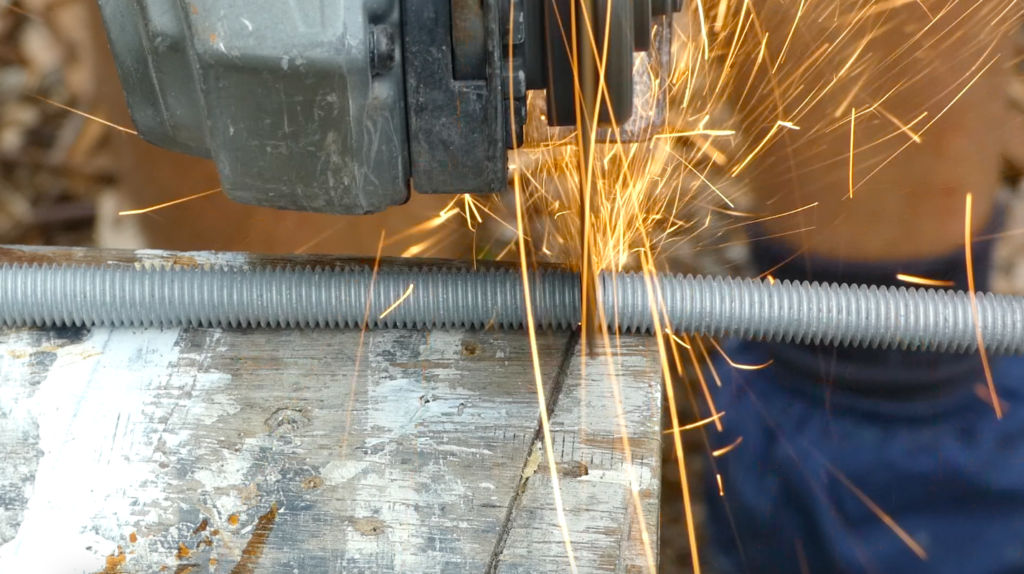
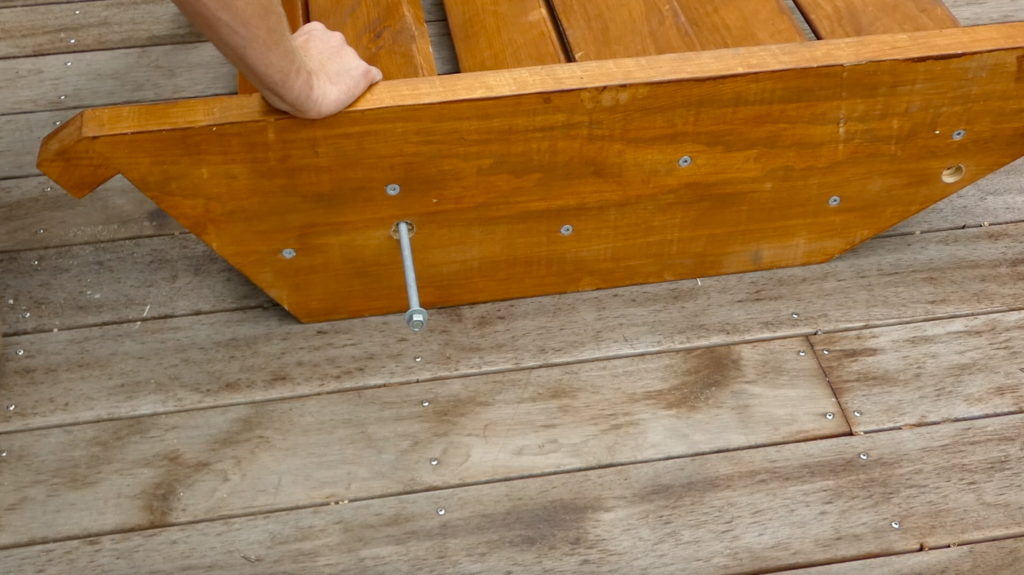
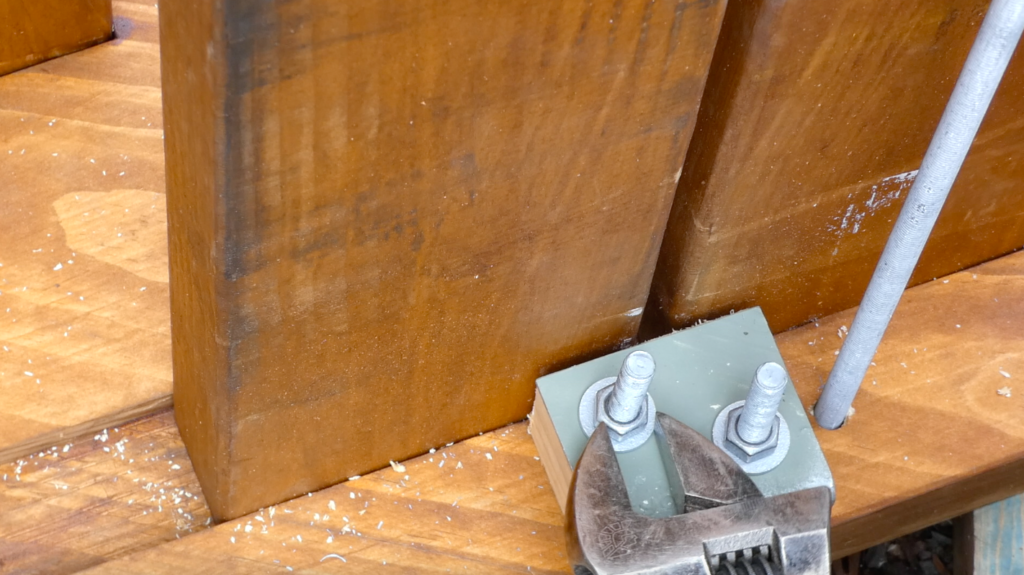
Install Threaded Rod Into Steps
To ensure the stairs never separate, I install two lengths of threaded rod into the stairs, one at the top and one at the bottom, and secure them with bolts and washers.
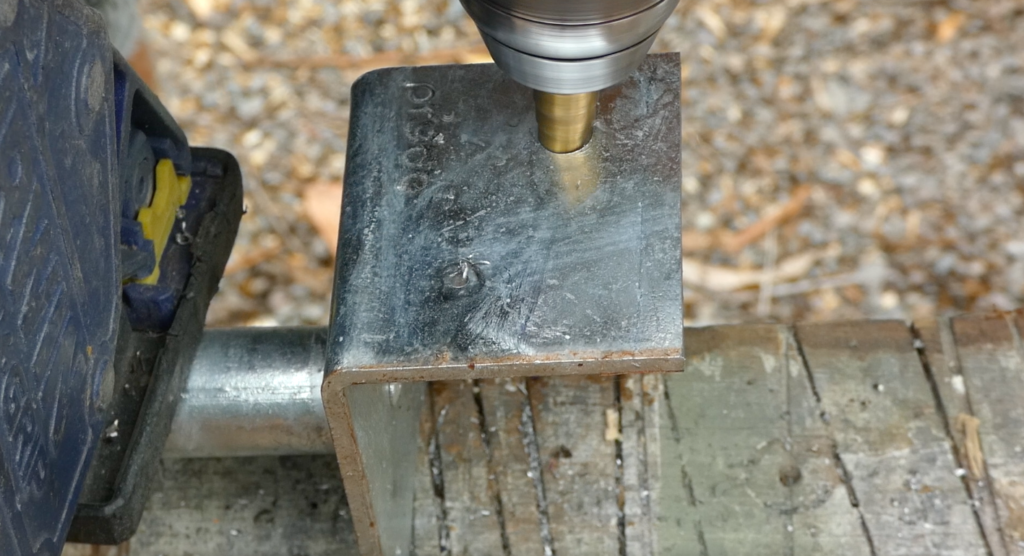
Attach Foot Stirrups Onto The Bottom Of The Stair Stringers
To attach these stairs to the ground, I install a galvanized metal stirrup onto each stringer. Since I am going to install the steps onto stirrups, I will need to trim a bit off the bottom of each stringer to allow me to concrete the stirrups into two footings.
These stirrups will be concreted into a footing on both sides of the stairs. I prefer to have the stringers sitting on stirrups that provide about 50 mm clearance from the ground level.
Mark Positions Of The Stair Footings And Dig Footing Holes
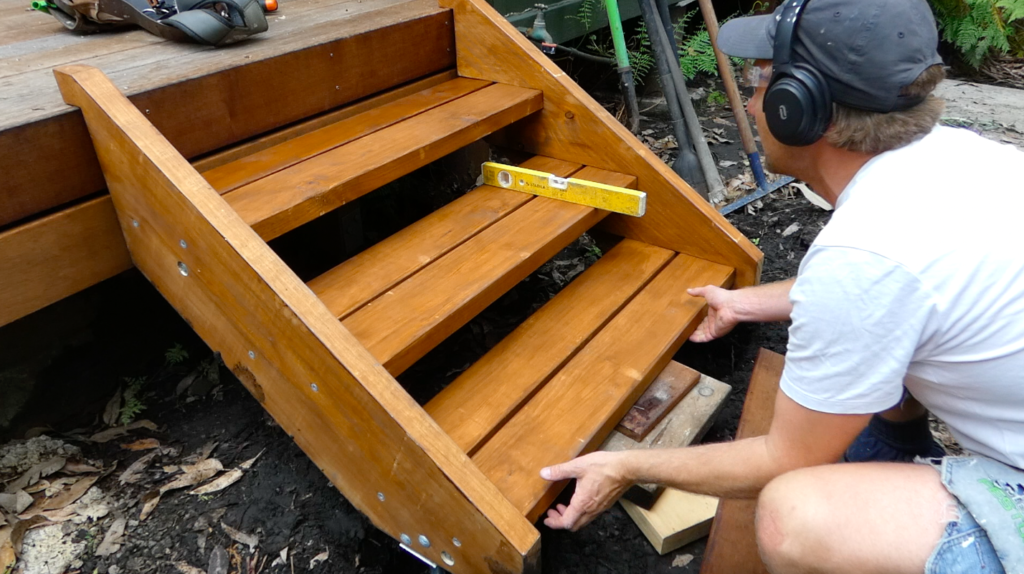
I place the stairs in the desired location, mark the positions of the stirrups, remove the stairs, and then dig the footing holes. I prefer to have the stringers on stirrups that provide about 50 mm clearance from the ground level.
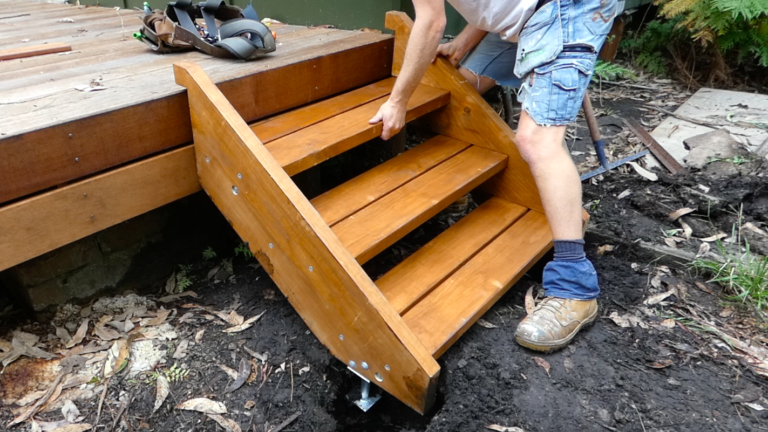
Install the steps
Once the holes are dug, I can position the steps and secure them by screwing through the point of attachment notch. Then, I temporarily support the stairs under the bottom tread. This allows me to concrete the stair stirrups into the footings while keeping the stairs at the correct height and level.
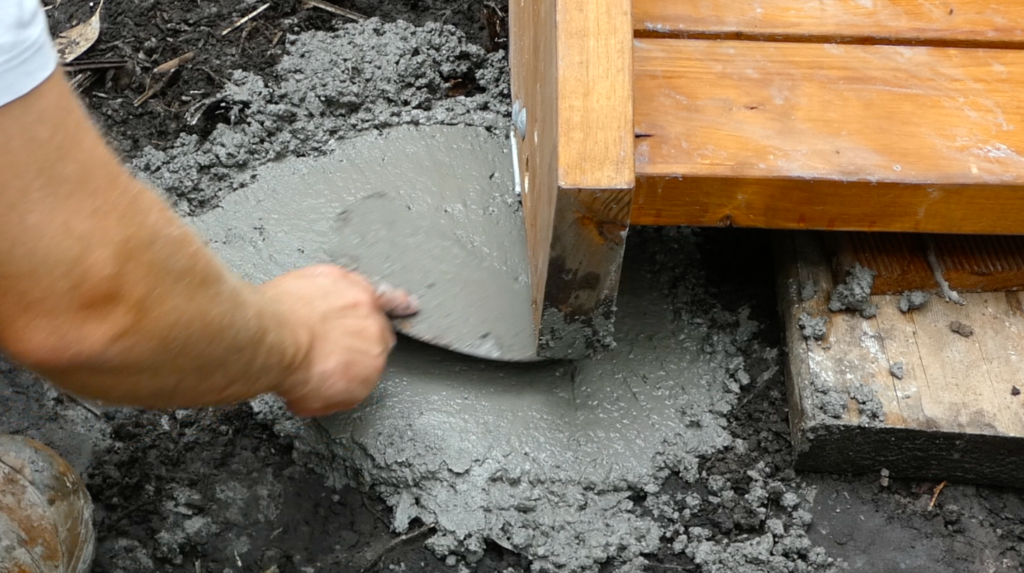
I pack the treads level, then finish attaching the stairs to the deck before moving on to mixing concrete. I then mix and pour concrete into the footings and finish smoothing it with a timber block and a metal screed.
If your next project is a new door installation check out our in depth guide here!
Conclusion
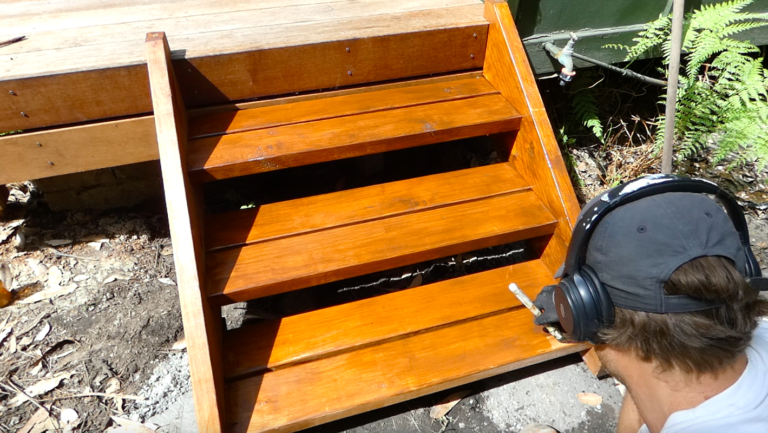
Okay, so the project is almost finished. Once the concrete has set, the last step is to thoroughly clean the stairs, lightly sand them, and apply a final coat of oil.
After ensuring the concrete is smoothly finished, I make sure to wipe down the stairs with a wet cloth to remove any residual wet concrete.
The final steps involve cleaning, sanding, and applying a final coat of oil.
I hope you have found value in this post on how to build stairs for a deck. Send me a message if you have any questions about your project!